Before your actual event, you might want to practice using Live Check-In with your volunteers or staff so you know what to expect the night of your event. Below are instructions on how to activate and practice without actually recording the attendance data on FundEasy. You are able to use all the Live Check-In features for as long as you want to. Just follow these instructions when you are all finished practicing.
Activating Live Check-In:
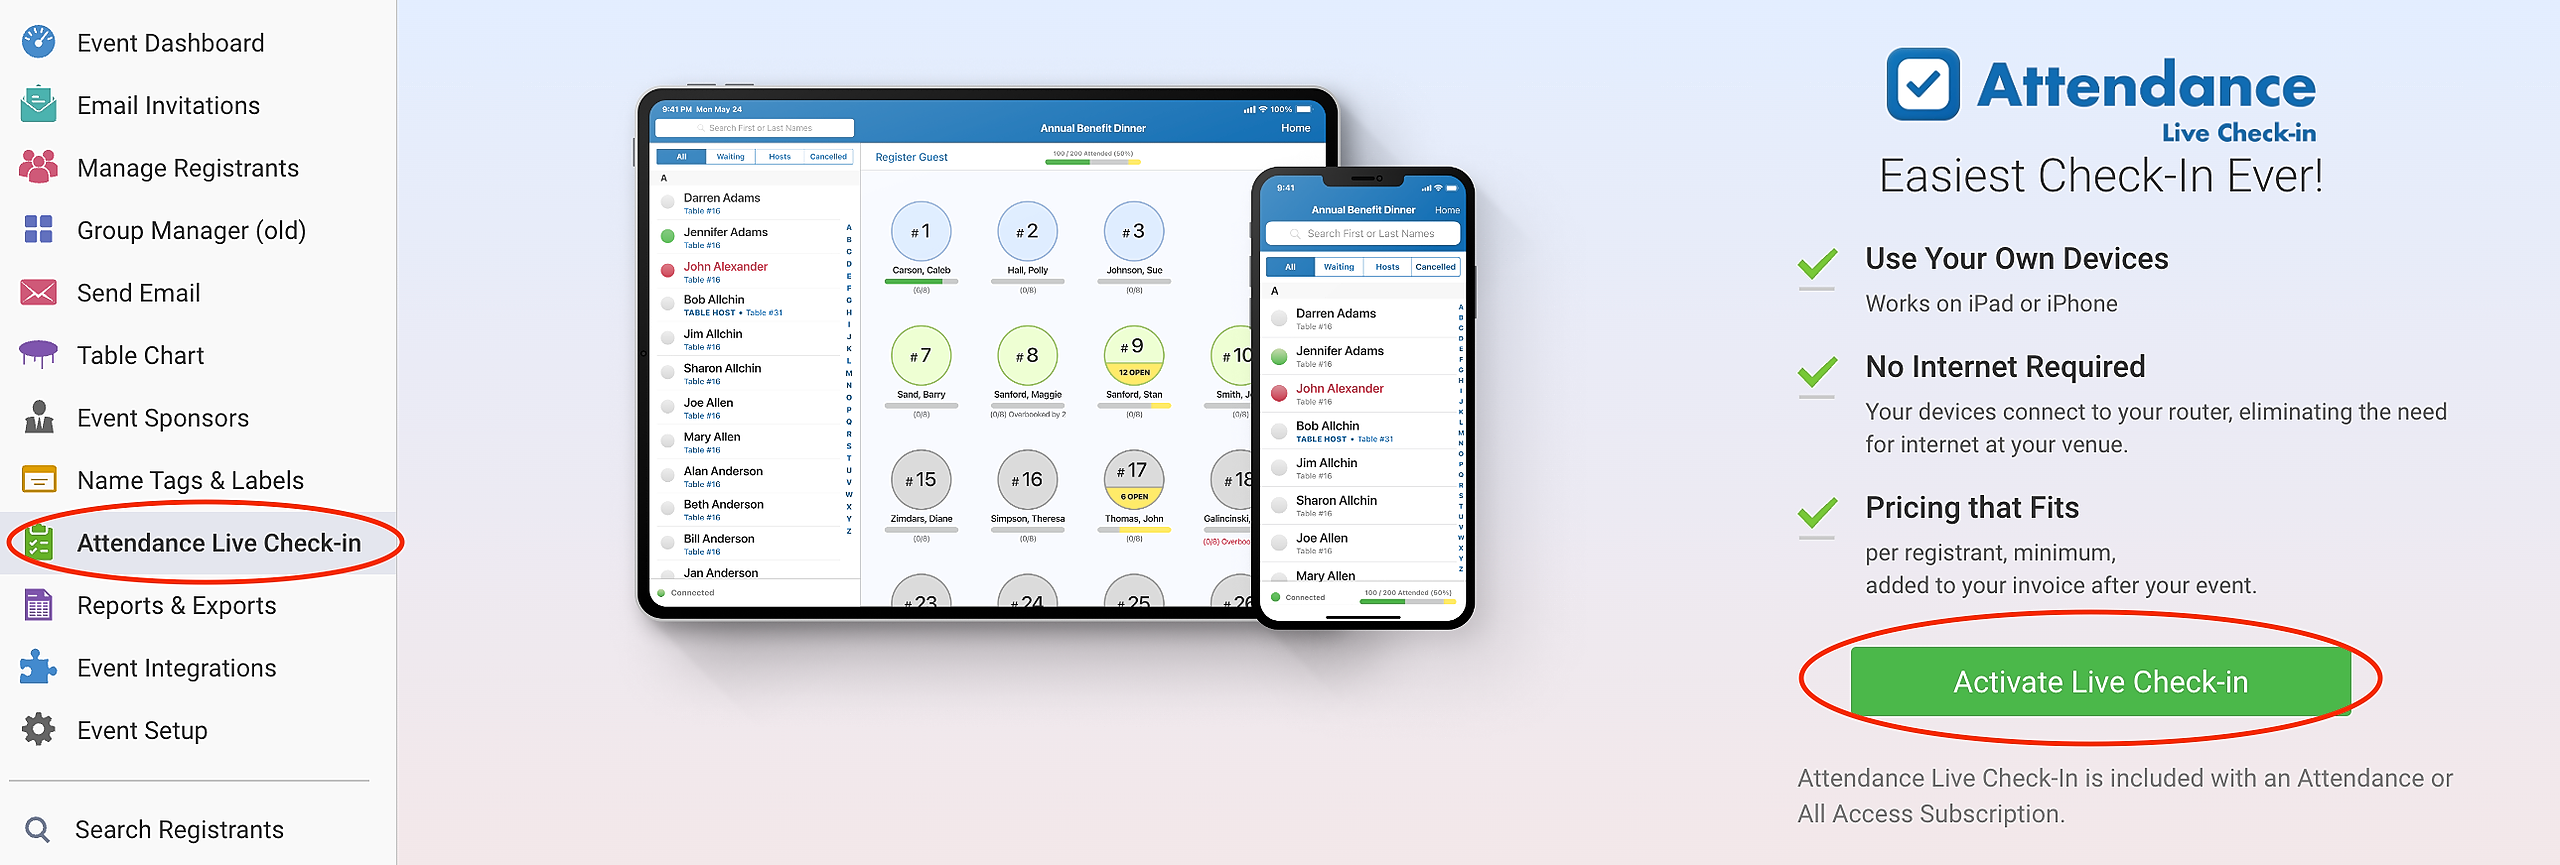
You can activate Live Check-In at any time from the Attendance Live Check-In tab in your event - the sooner the better! Activating Live Check-In does not open a Live Check-In session, so you can activate well in advance of when you intend to practice or launch your real event Live Check-In session.
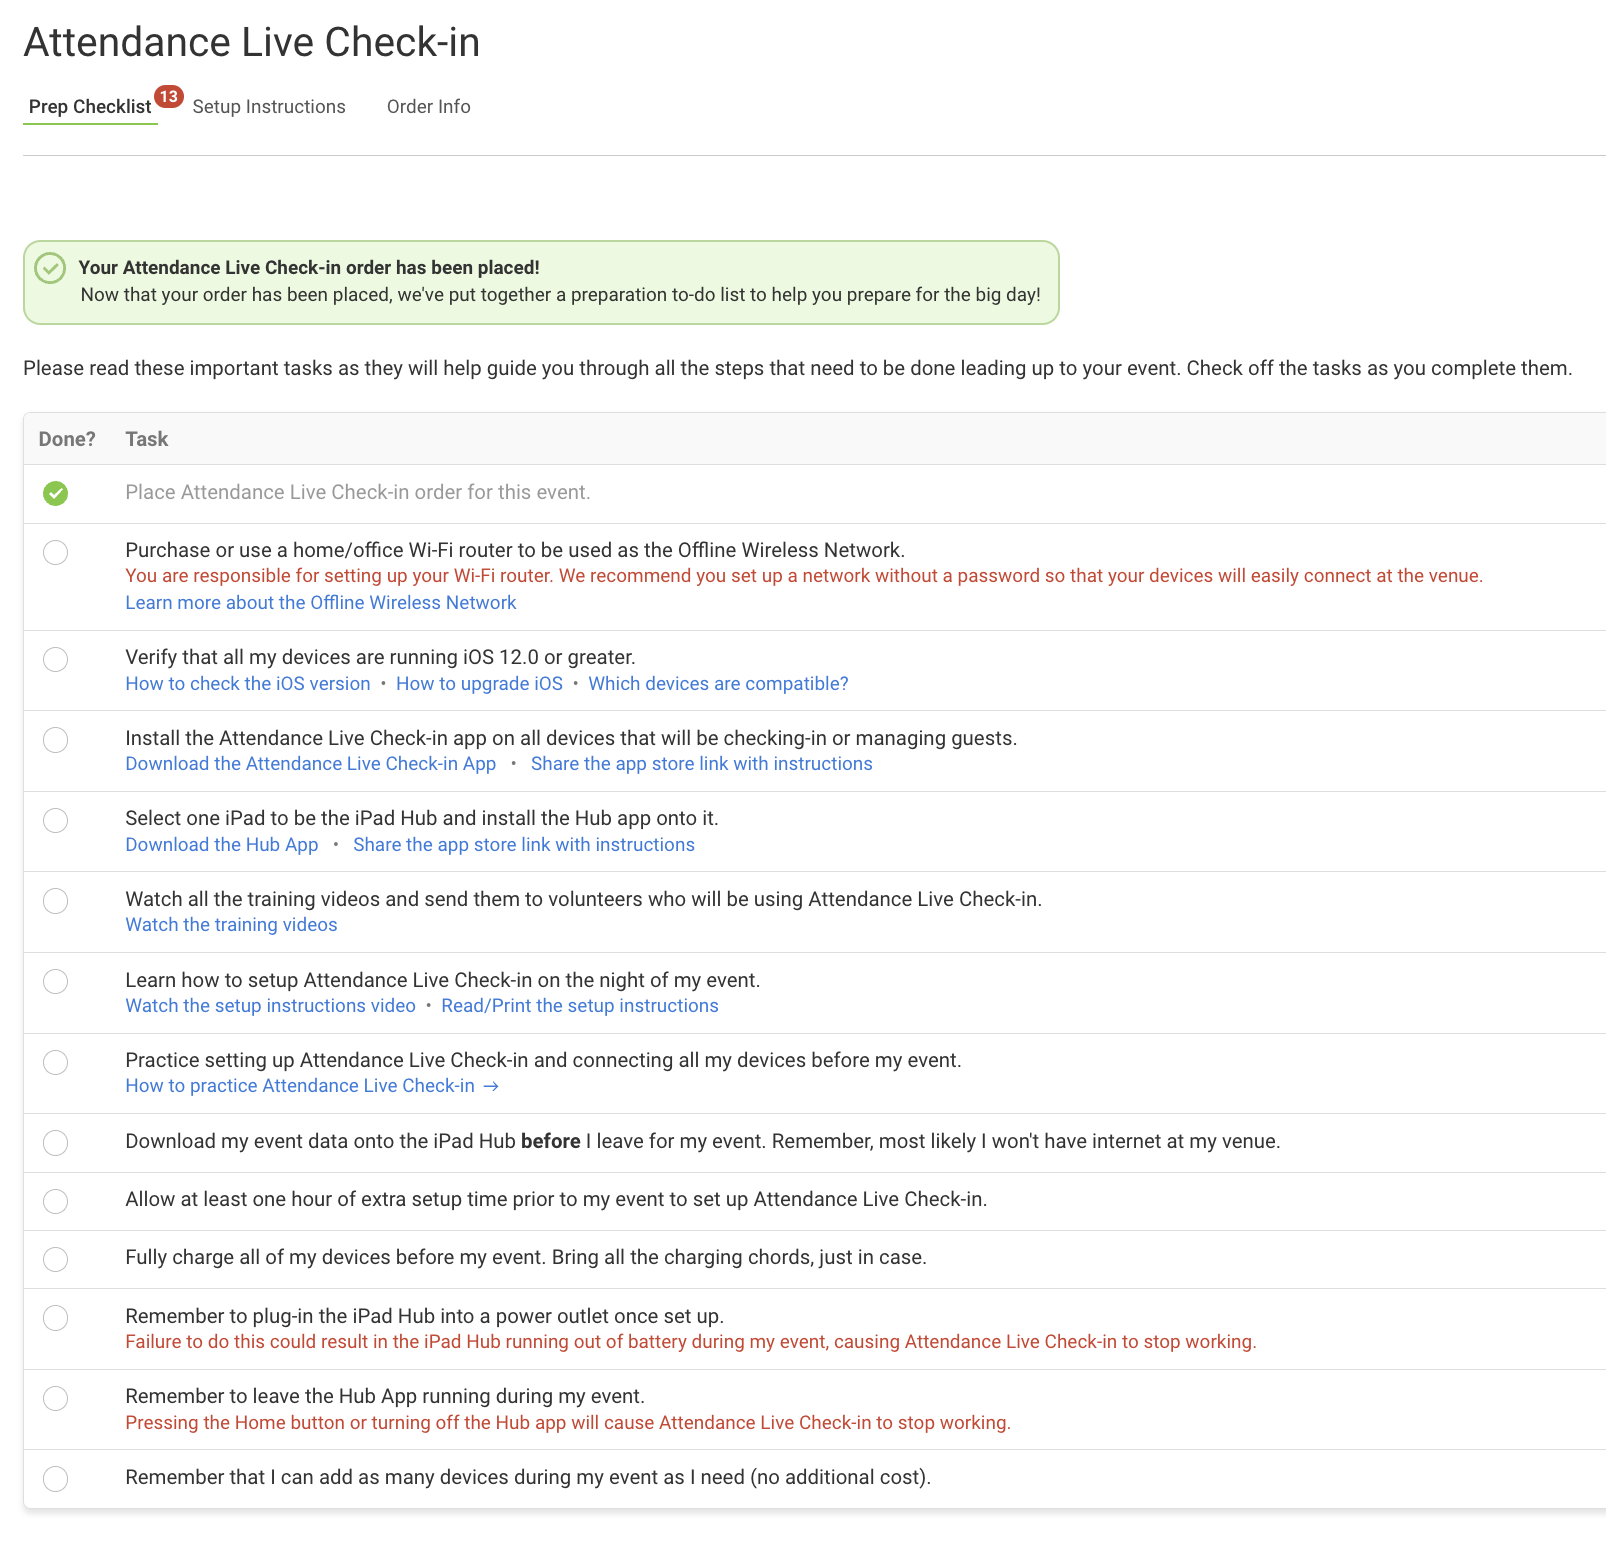
Activating Live Check-In not only enables it for use in your upcoming event, but it helps you determine the devices and equipment you'll need, as well as provides a checklist of information you'll need to make sure you're prepared for using Live Check-In at your event (seen below).
How to Practice:
After activating, practicing with Live Check-In allows you to initiate a Live Check-In session with your event data so you can test your equipment and get familiar with how Live Check-In works. When you're done, you'll be able to erase your practice data so you can start fresh with a new Live Check-In session when it's time for your event.
Note: Your event will be closed during practice mode, and you will need to go into FundEasy to re-open it after you have finished practicing. If you were on the Live Check-In in Session page, click the FundEasy logo and then back into your event.
From inside FundEasy, make sure your Table Chart has been created and all of your tables--even any empty ones--have Groups assigned to them. All tables need to have Groups assigned to them. If you don't have Groups at all your tables, Live Check-In will add "Overflow Groups" to your Group list. So, when you download into the Hub, any tables on the table chart with no group assigned will create a new ‘overflow’ group.
From inside the Attendance Live Check-In Hub app, follow all the on screen prompts to connect to the internet and to download your data.
Follow all the normal instructions to connect your devices and use Live Check-In on your own iOS devices until you are all finished practicing.
When you are finished practicing press "Finish Live Check-In" on the iPad Hub from the "Good to Go" screen.
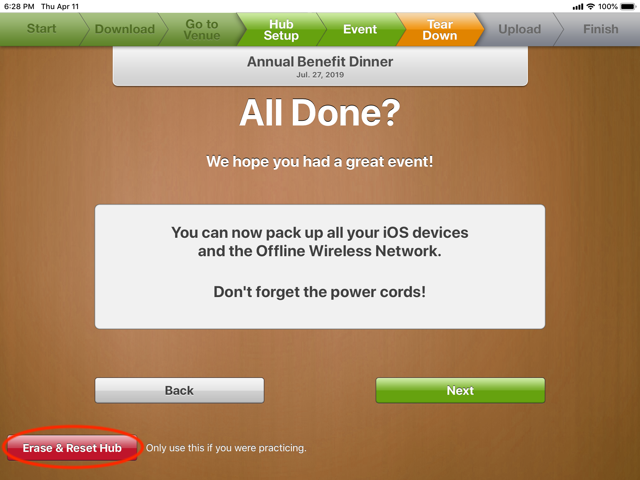
On the "All Done?" screen is where you divert from the normal instructions.
Make sure your iPad Hub is no longer connected to the Router and is instead connected to your wifi.
Press "Erase & Reset Hub".
Follow the on-screen instructions to Erase & Reset the Hub.
On the Erase & Reset Hub page, click Continue.
Confirm that you want to reset the Hub.
Click Okay. Your data has been erased from the Hub. You'll need to download your event data again before your event.
Remember to open your event when you are done.
Note: If, after practicing Live Check-In, you see the lock out screen, click the FundEasy logo and then back into your event. If, after following these steps, you cannot access your event in FundEasy, open the Hub app and make sure that you've completed all the steps to Erase and Reset the Hub. In rare cases when there may be a weak internet connection, you may need to log into the Hub app again and repeat these steps if you are unable to access your event. Remember, you must be connected to the Internet, not the Router, to erase and reset your Hub.