If you recently created a new account with FundEasy, welcome aboard! Below are some instructions and helpful tips for navigating your account and getting the most out of what FundEasy offers!
Step 1: Get to Know Your Account and Update Your Information
Step 2: Access Your User Profile and Invite Your Team
Step 3: Know Where to Find Help
Step 4: Create Your First Event
STEP 1: Get to Know Your Account and Update Your Information
"My Account" Overview
When you log into the new FundEasy, you'll land on the Home page.
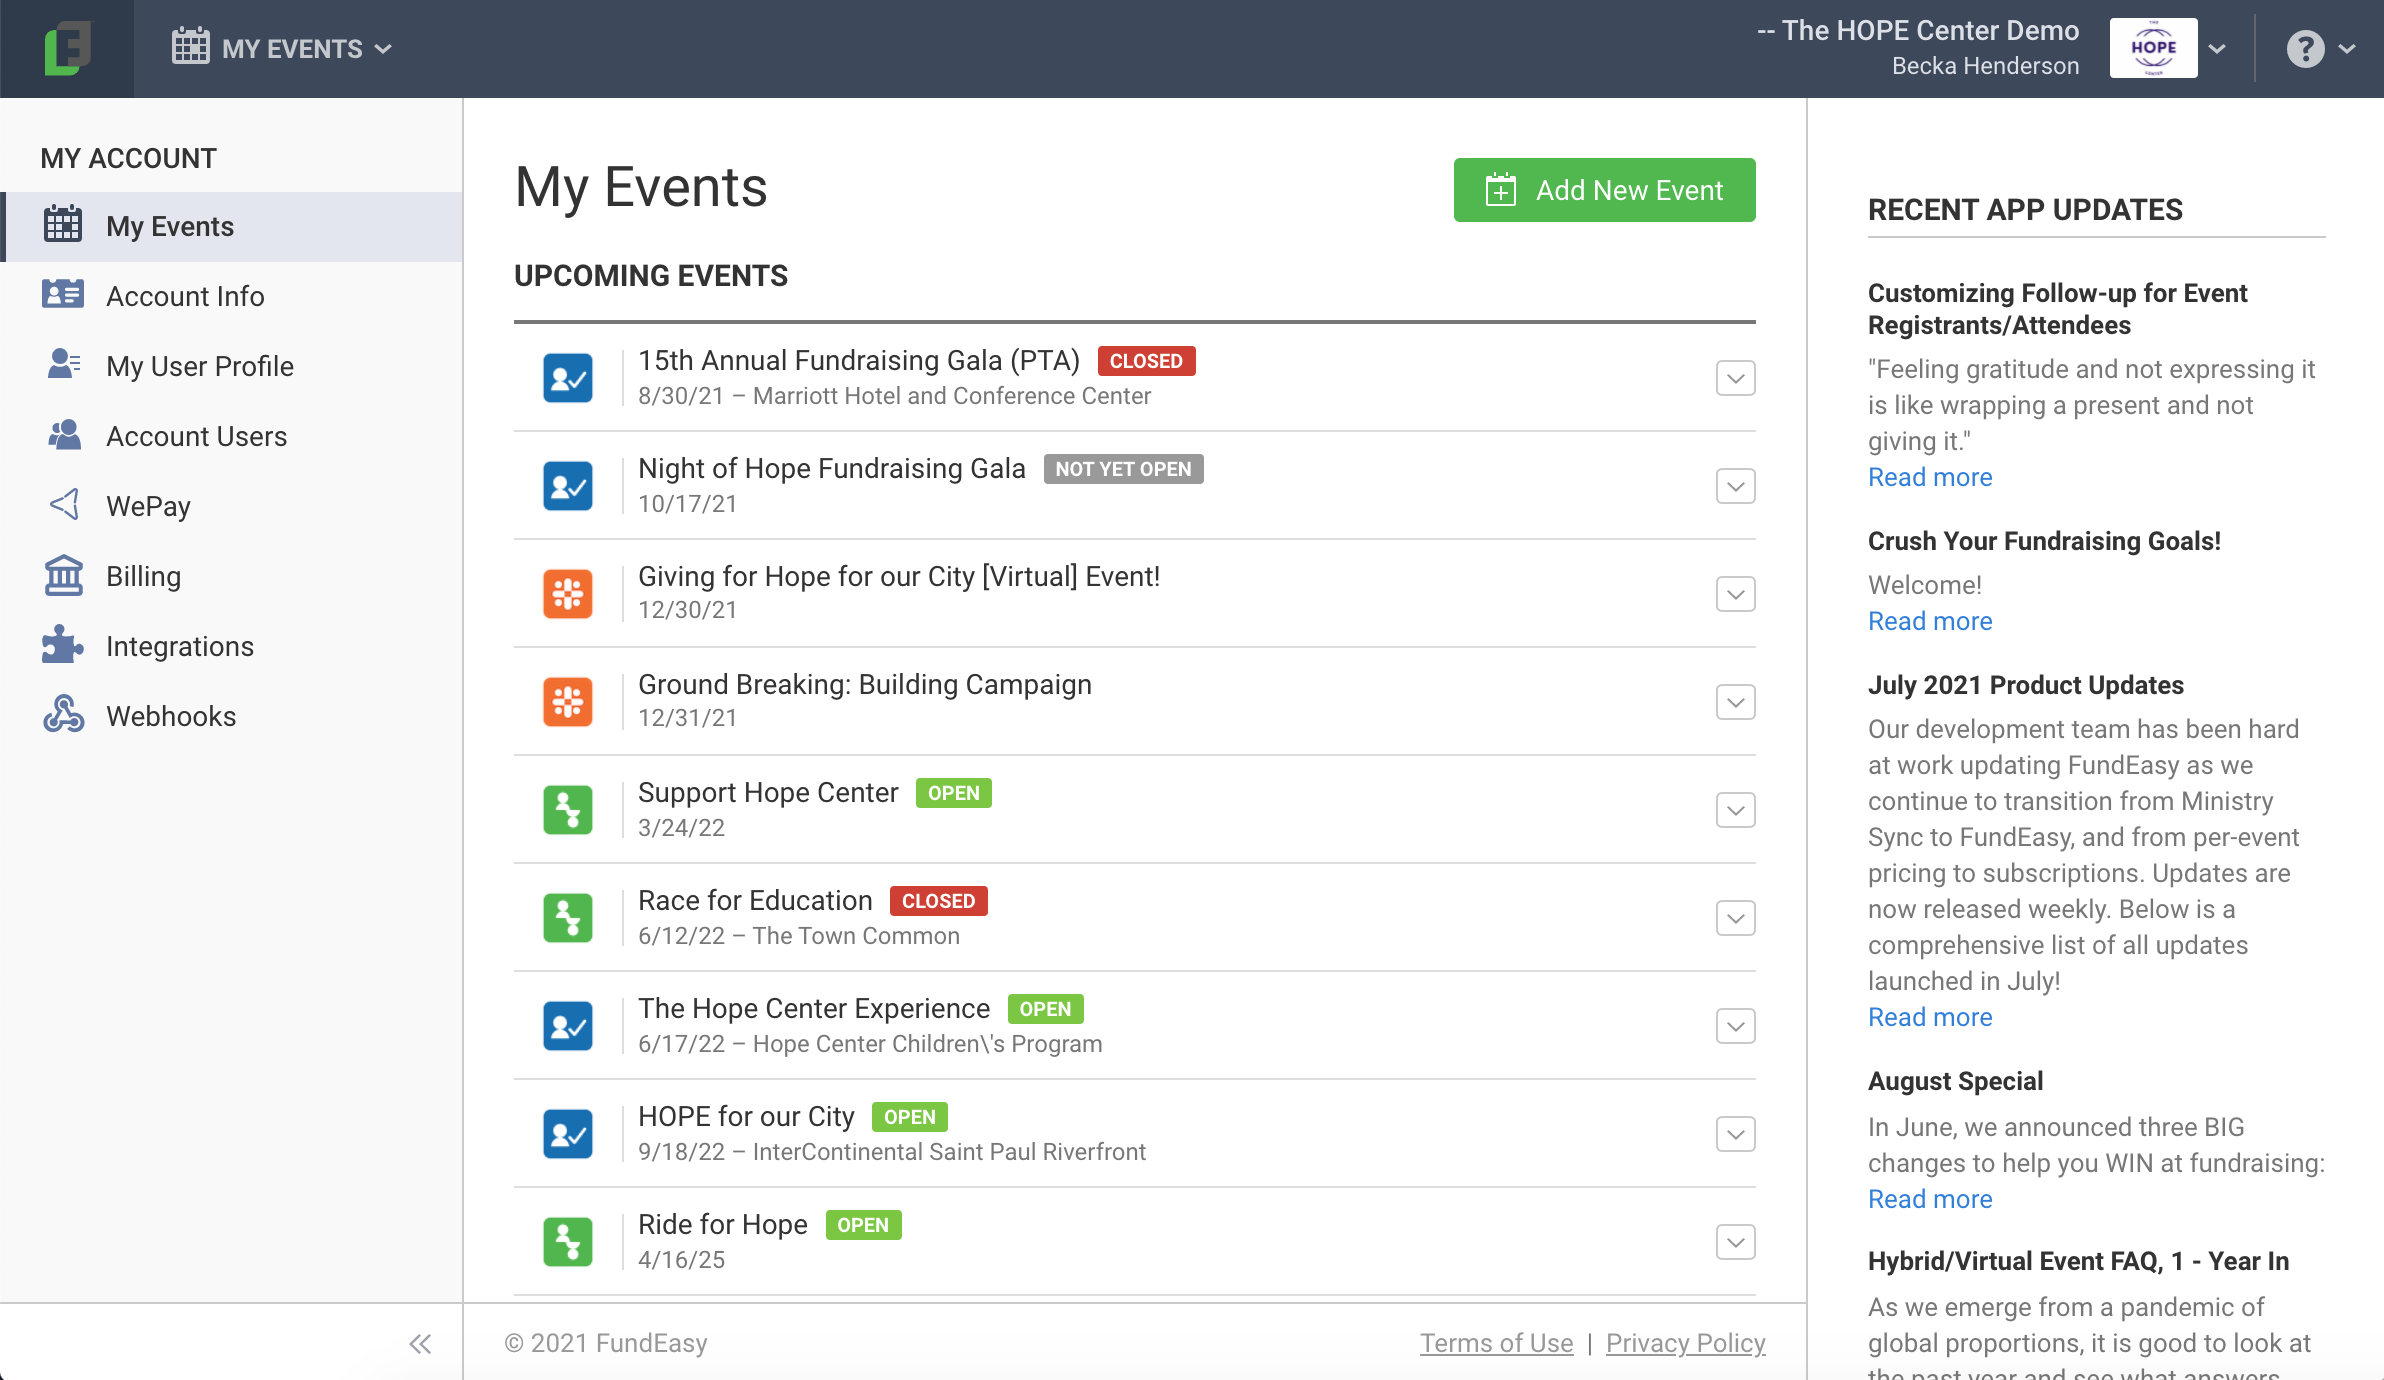
In the My Account section on the left, you'll see links for:
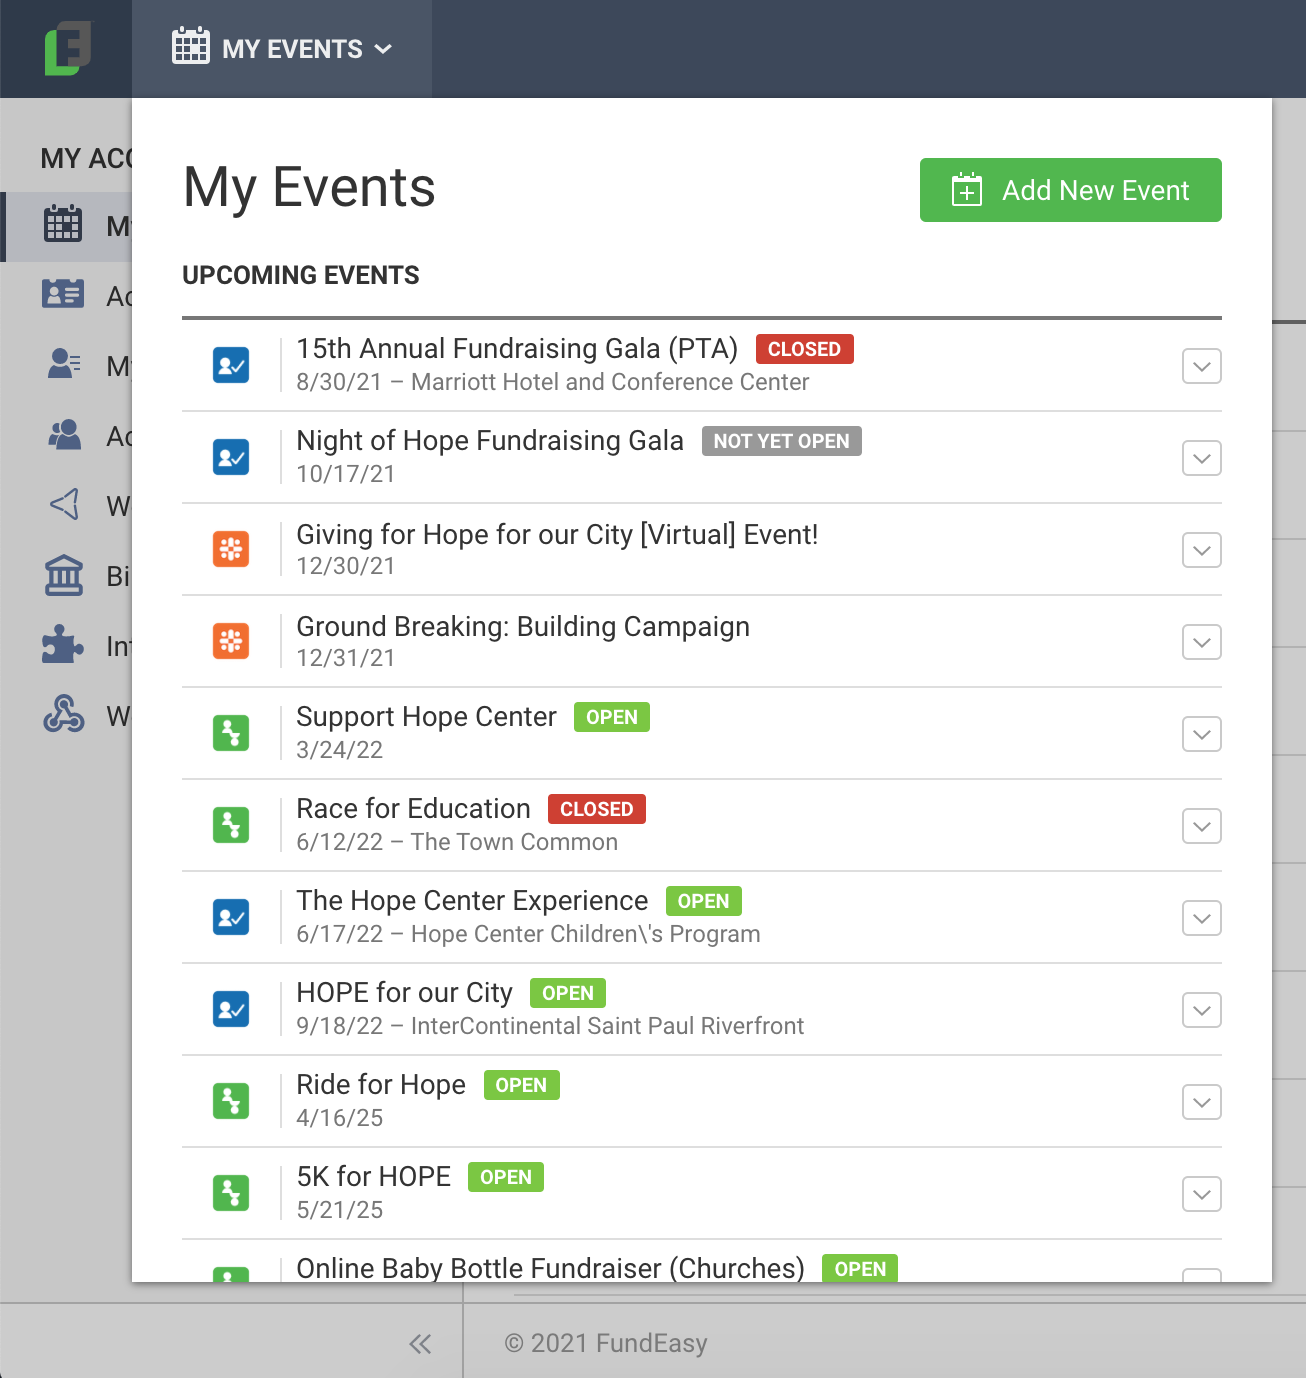
My Events - this tab lists your upcoming events and past events (categorized by year), allows you to create a new event with the Add New Event button, and includes the RSS feed of Recent App Updates from our blog.
Account Info - here you can see and edit your organization's information and upload your organization logo.
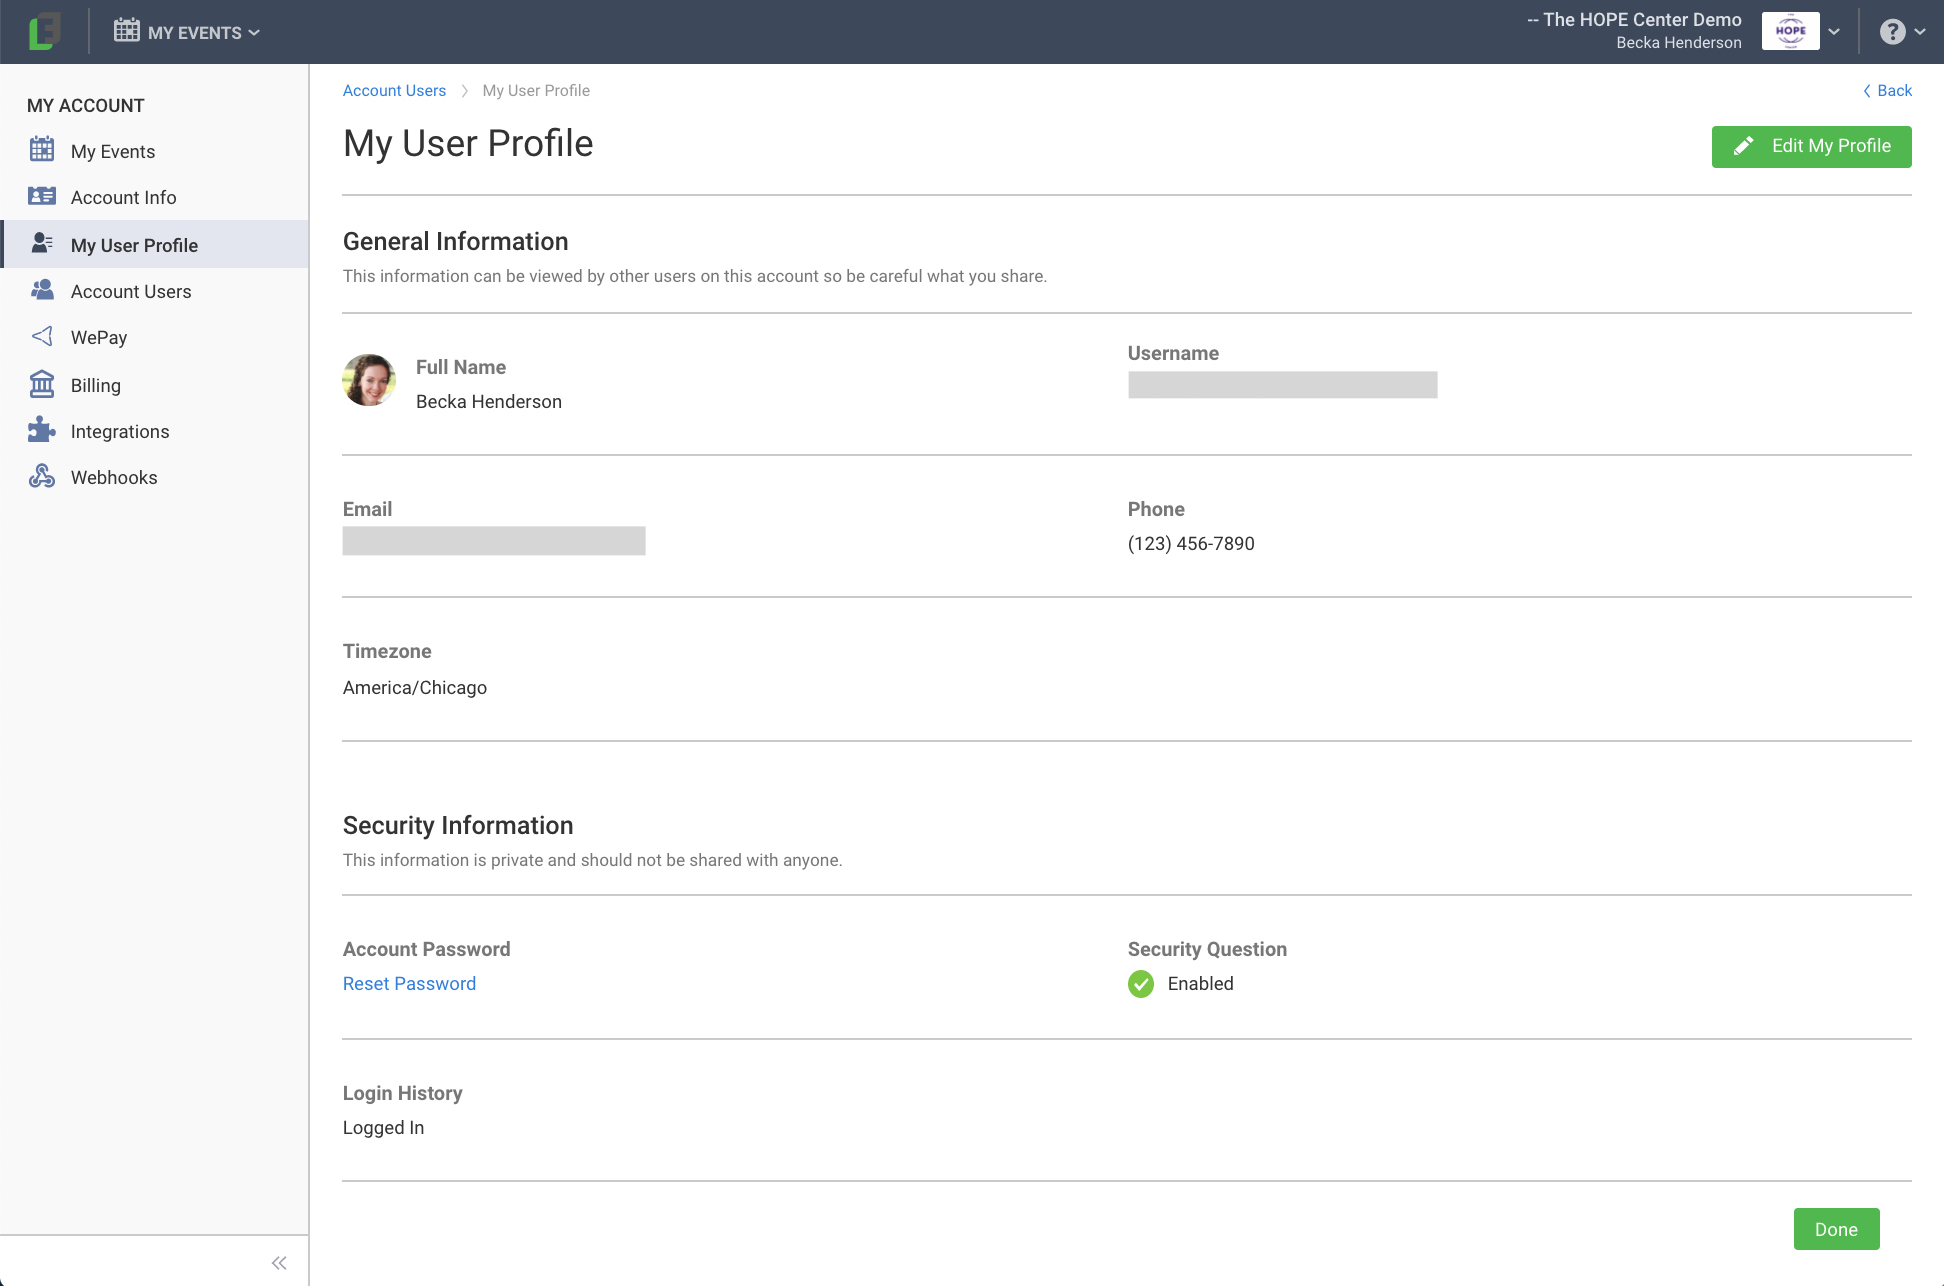
My User Profile - this tab shows your name, username, email address, etc., allows you to edit that information, and gives you the option to reset your password.
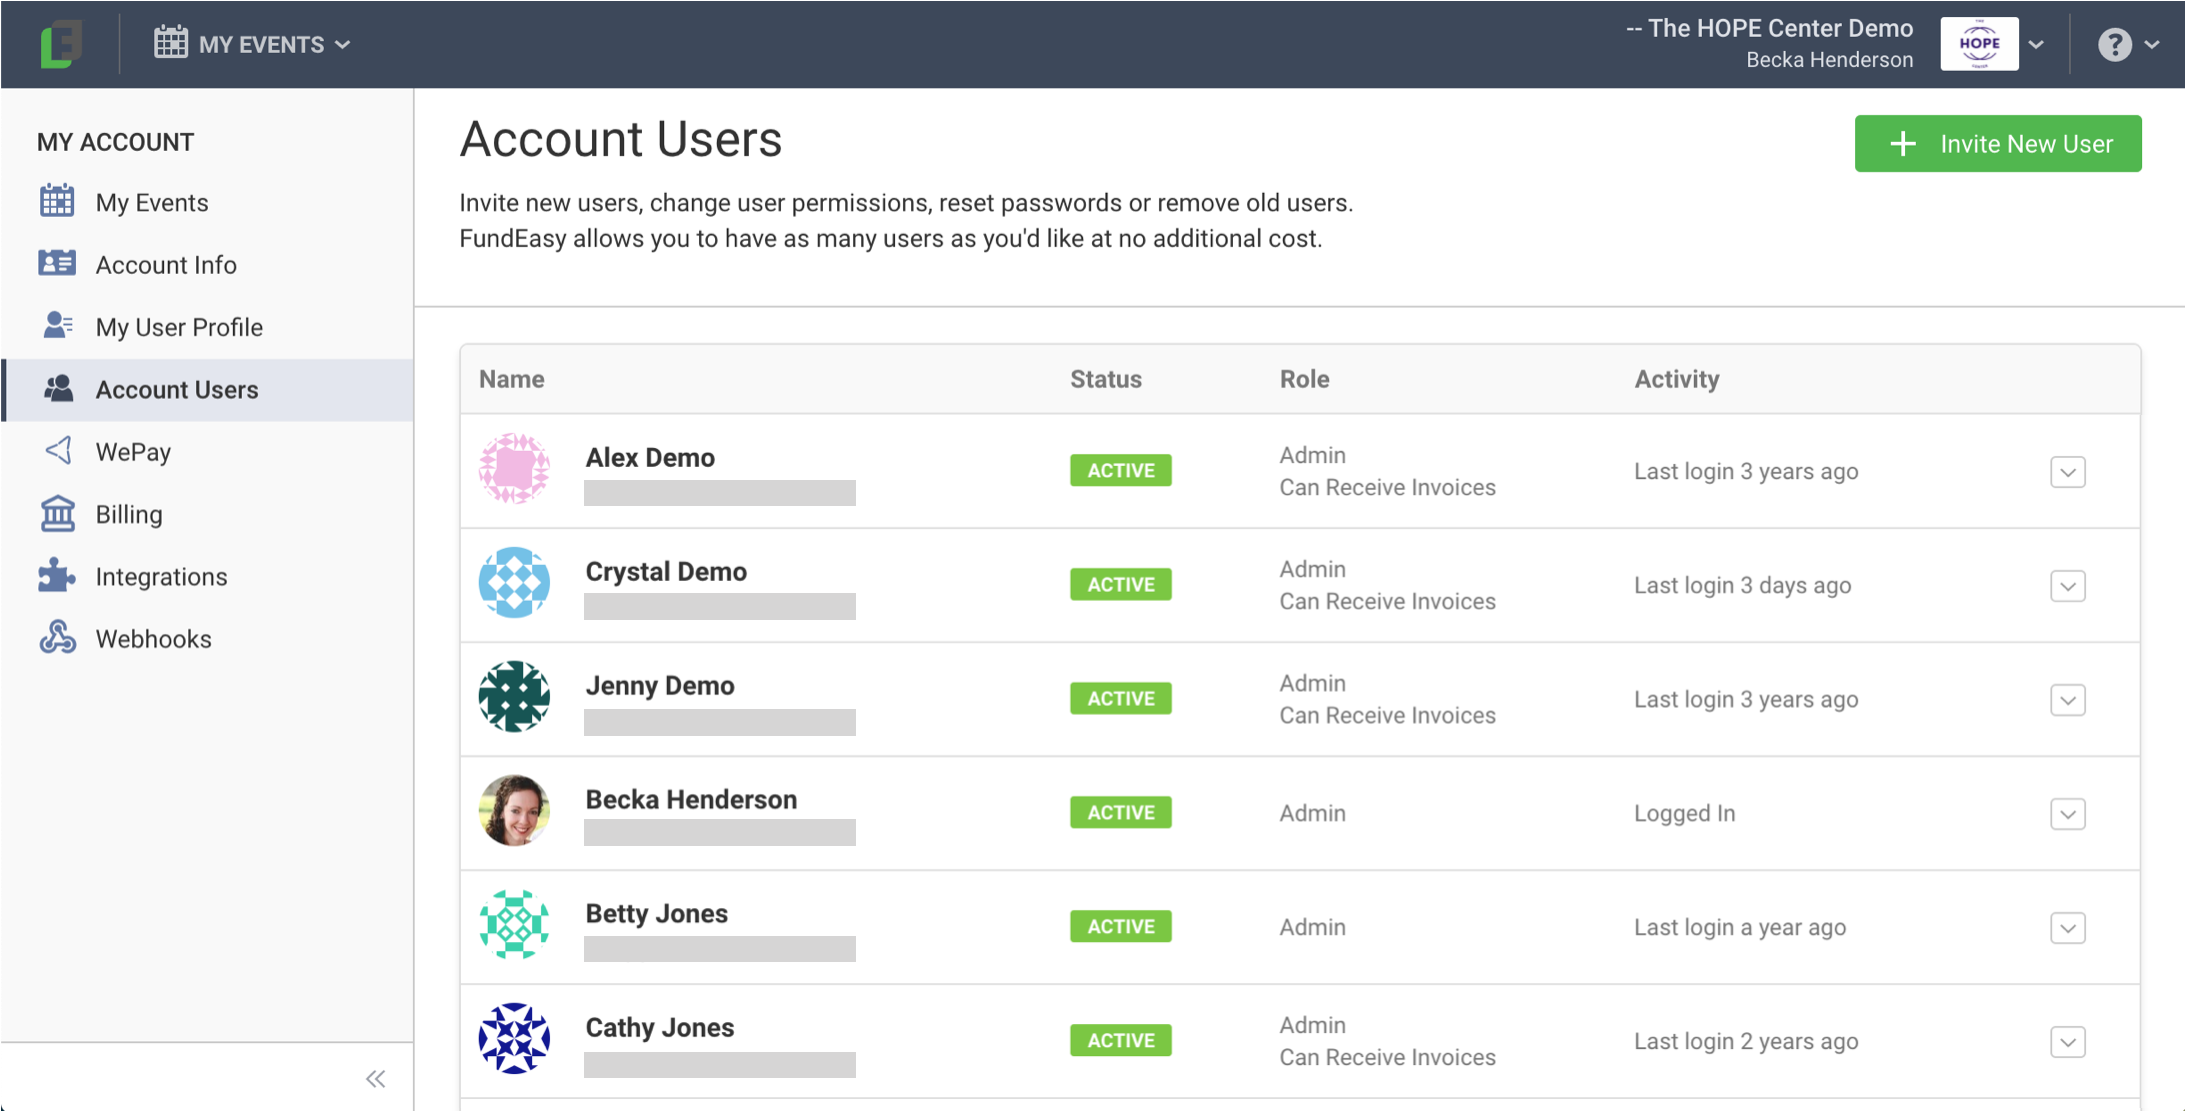
Account Users - here you can see and manage the other users in your account and invite new users.
WePay - if you previously used WePay as a payment processor this tab gives you access to your WePay account information and settlement reports, allows you to sign into your WePay account, etc.
Billing - this tab lets you view your subscription plan, payment method, and billing history as well as add a payment method and update your billing information.
Integrations - here you can connect your events to other apps.
Webhooks - this tab allows you add webhooks to your event.
The My Events dropdown in the top left corner will also show a list of your events, which allows you to switch between events even when you're not on your home page. You can add an event from this dropdown as well.
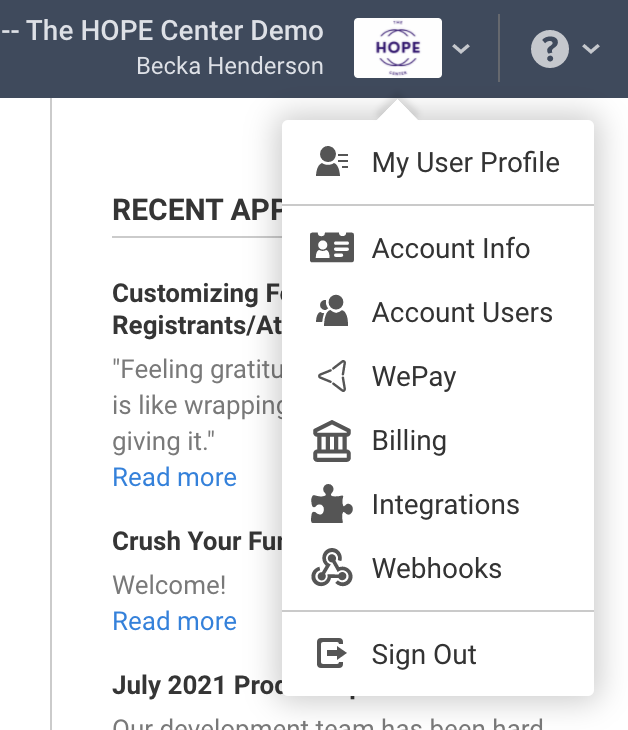
The other tools in the My Account section (listed above) are also accessible by clicking your logo in the top right corner.
This article has more helpful information about navigating your account!
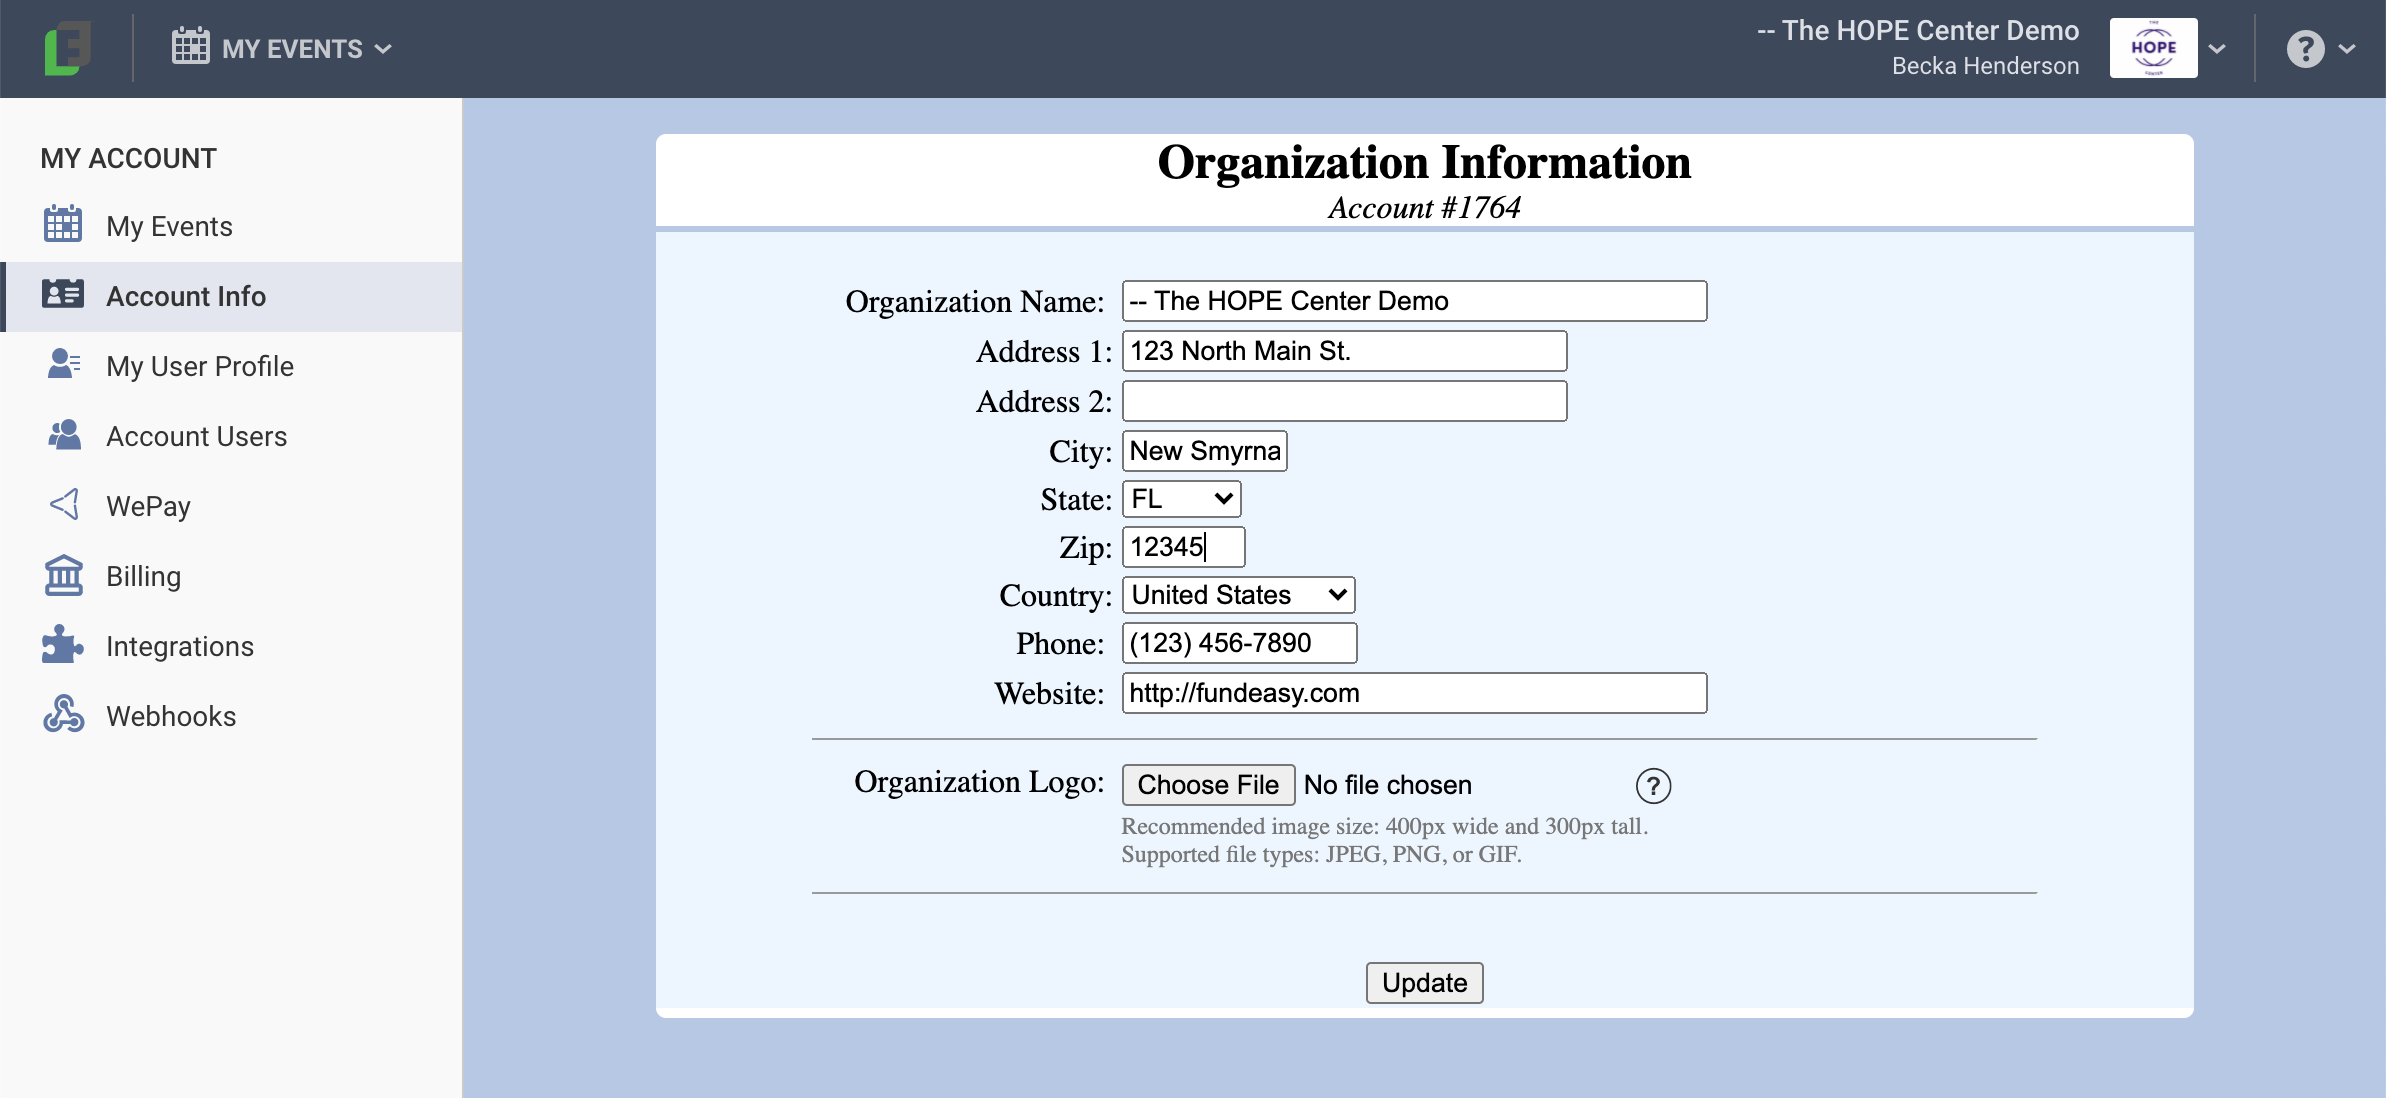
How to Update Your Organization Info and Upload Your Logo
Click your logo in the top right corner and choose Account Info.
OR
Click the FundEasy logo in the top left corner and click Account Info in the navigation column on the left.You can edit your organization name, address, phone number, and website.
To upload a logo, click the Choose File button, select an image from your computer, and click Open.
When you're done, click the Update button at the bottom.
STEP 2: Access Your User Profile and Invite Your Team
How to Update Your User Profile
Click your logo in the top right corner, choose Account Users, and click on your user.
OR
Click the FundEasy logo in the top left corner and click My User Profile in the navigation column on the left.Click Edit My Profile in the top right corner to edit your name, username, email address, phone number, time zone, or security question.
Click the Reset Password link to send yourself an email to reset your password.
How to Invite Other Users
Click your logo in the top right corner and choose Account Users.
OR
Click the FundEasy logo in the top left corner and click Account Users in the navigation column on the left.Click the Invite New User button in the top right corner.
Fill in the name and email address of the person you're inviting, choose the permission level for that person, and click Save. You can read more about users and permission levels here.
STEP 3: Know Where to Find Help
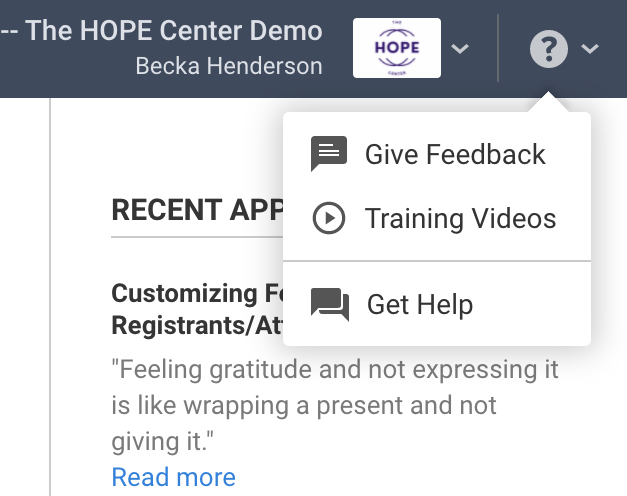
How to Access Help Tools
Click the question mark in the top right corner of your account to:
Leave feedback about your experience
Watch instructional training videos
Access lots of helpful Knowledge Base articles and contact our Support Team
This article has more info about our help tools and contacting our Support Team.
STEP 4: Create Your First Event
How to Create Your First Event
From your FundEasy Home page or your My Events dropdown, click the green Add New Event button.
Choose the appropriate product for your event and click the green Get Started button.
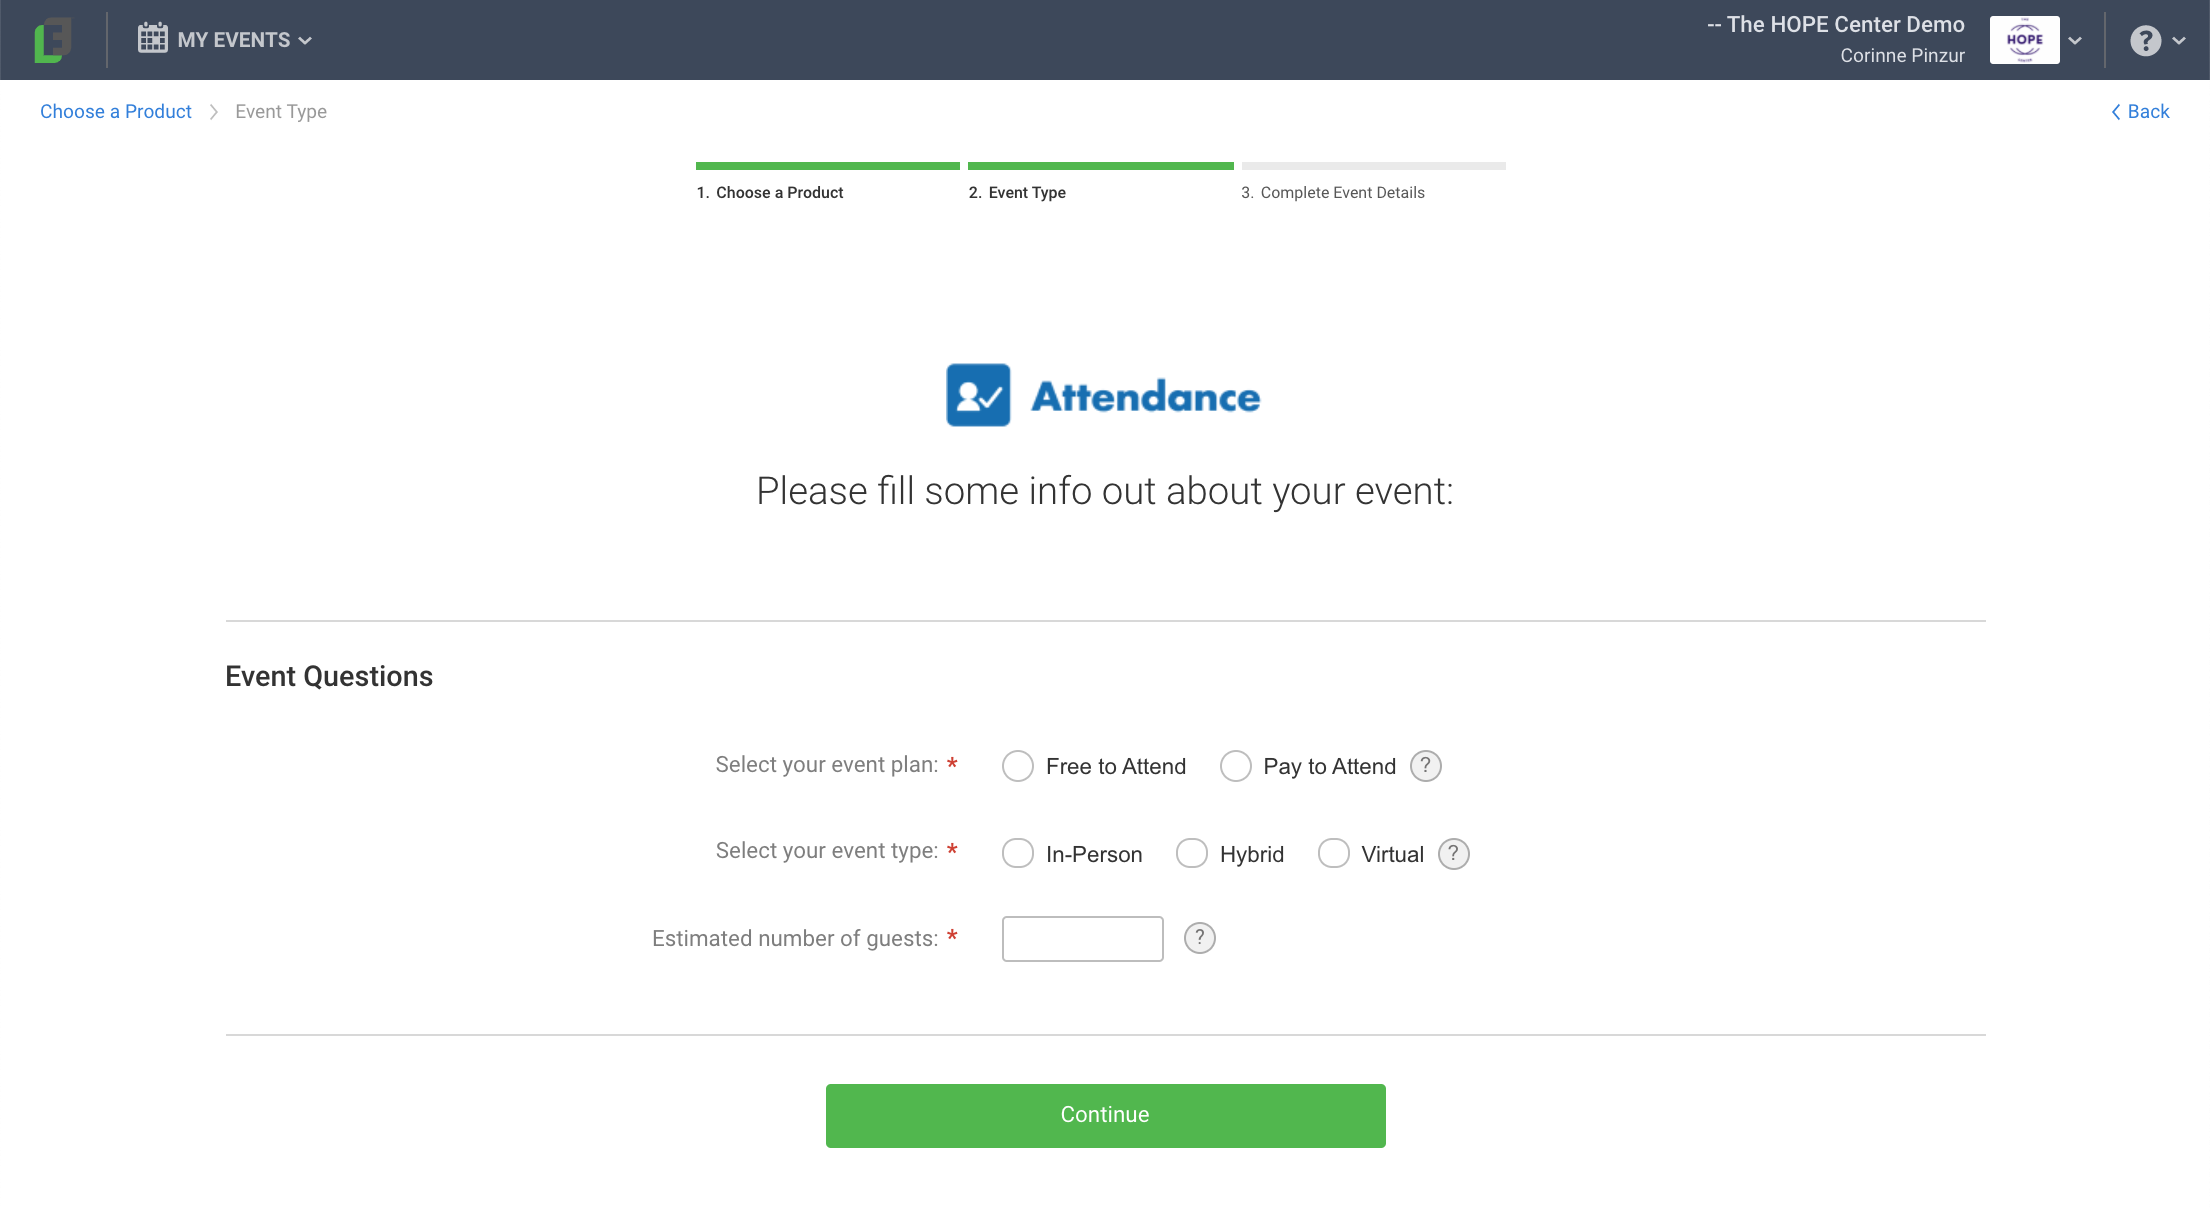
Attendance: Registration, event management, and attendance tracking
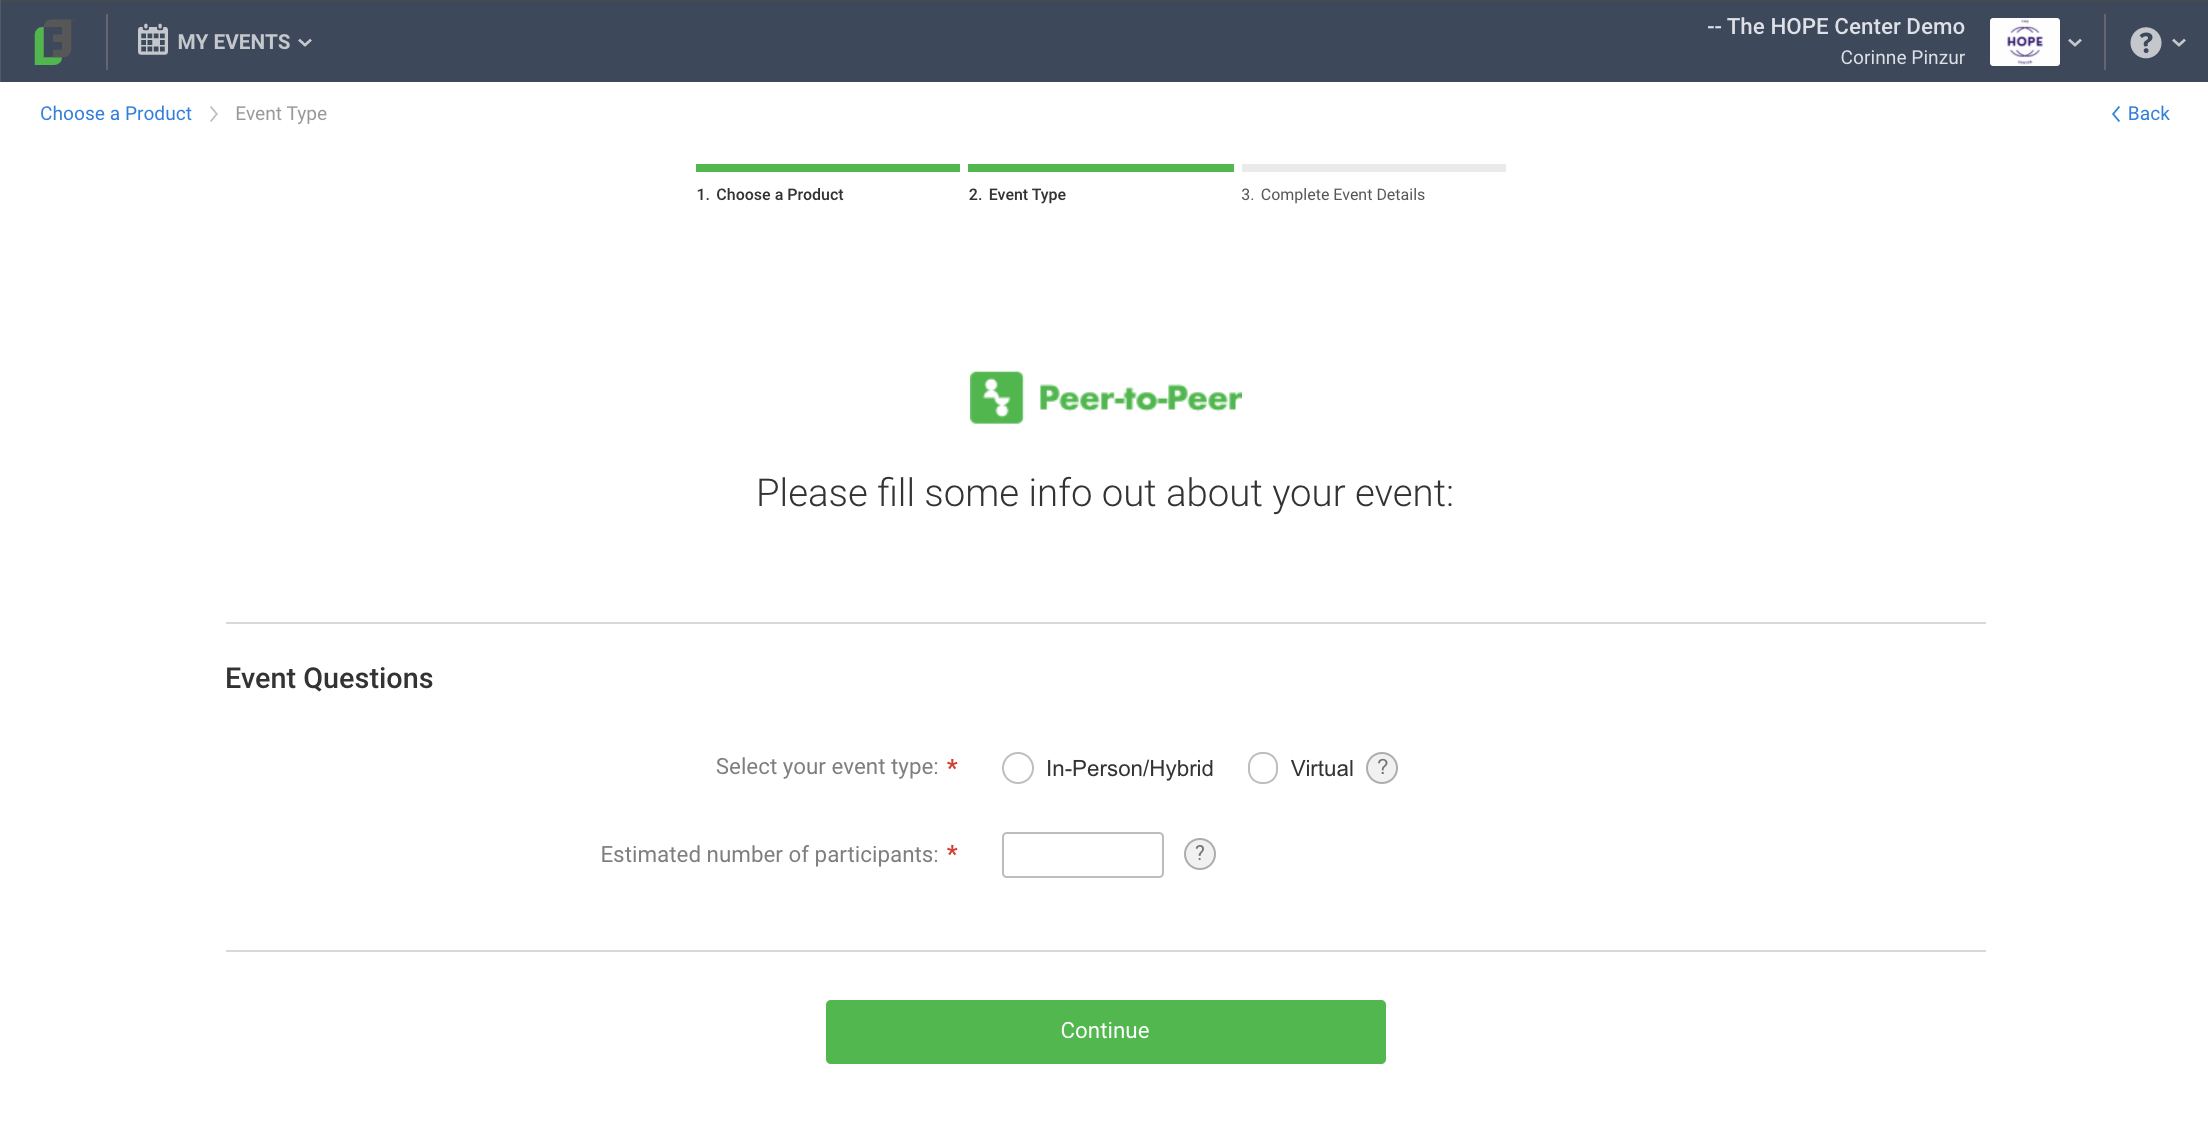
Peer-to-Peer: Event registration and fundraising
Crowdfunding: Single giving page for project funding
(For Crowdfunding, this step is not necessary.)
If you selected the Attendance product, select your event plan and event type and enter your estimated number of guests.
If you chose the Peer-to-Peer product, select your event type and enter your estimated number of participants.
In-Person: Registrants attend the event at your venue in person. Locations and maps are in your templates by default.
Hybrid: Some registrants attend the event at your venue, while others join virtually.
Virtual: Your event is held online with no in-person guests. Locations and maps are removed from your templates.

Fill out the initial Event Details. Only the required fields need to be filled out - and don't worry, you'll be able to change those fields and fill out the others at a later time in Event Details!
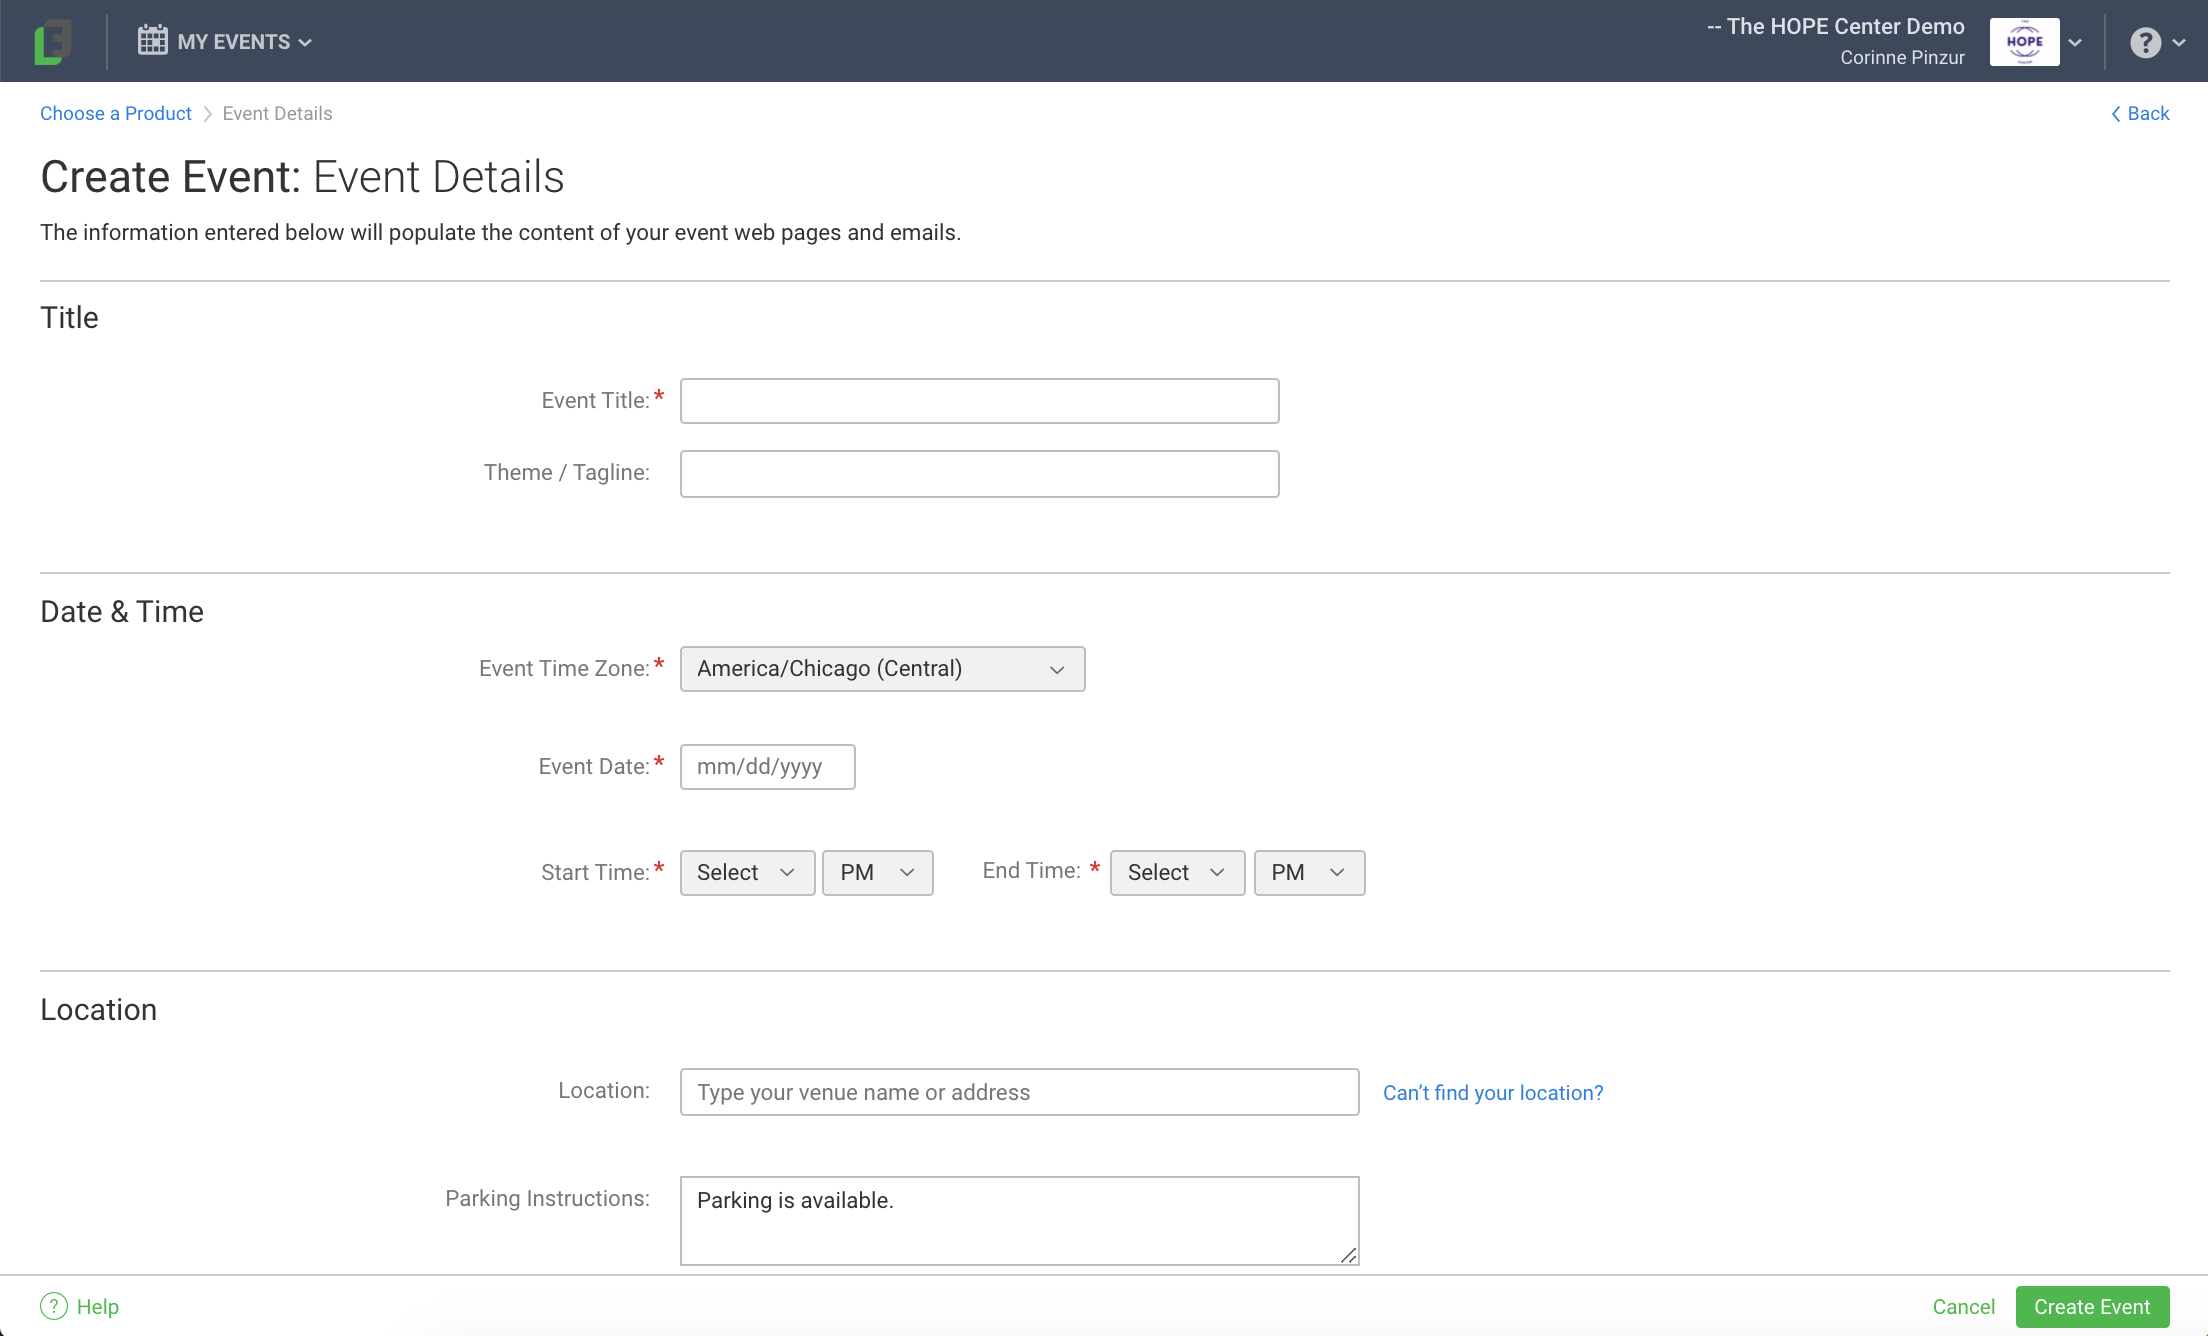
Click the green Create Event button in the bottom right corner.
Once the event is created, go to Event Setup and walk through the setup steps to get your event ready to open to the public! This article has more helpful information about Event Setup.
Congratulations! You've set up your account and are ready to start fundraising!
Peer-to-Peer/Attendance Training Video: Admin Tools, Home Page, Top Toolbar
Read video transcript here!