To start setting up your event, you'll begin with the Event Details. The event information you add here fills in your web and email templates for you, so you'll need to add this information before moving on to other parts of your event setup. You can always come back to this screen to make changes.
The fields in Event Details are similar for Attendance and Peer-to-Peer. Below are the Attendance fields. You'll find Peer-to-Peer-specific information near the bottom of the page.
Title
The name of your event
Theme / Tagline

Date & Time
Click the date text box to add or edit the date of your event. This is the date that registration for the event will close. If you don't close the event registration manually, the event will close at midnight at the end of this day.
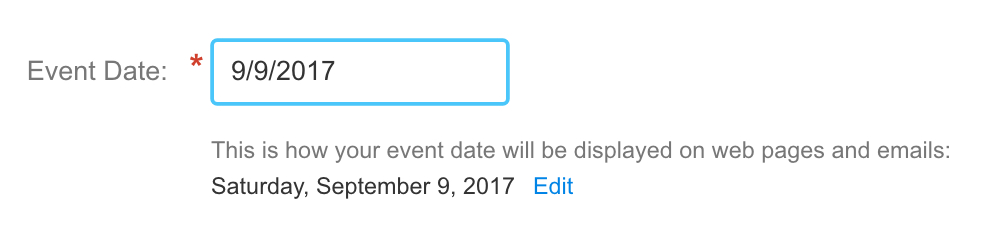
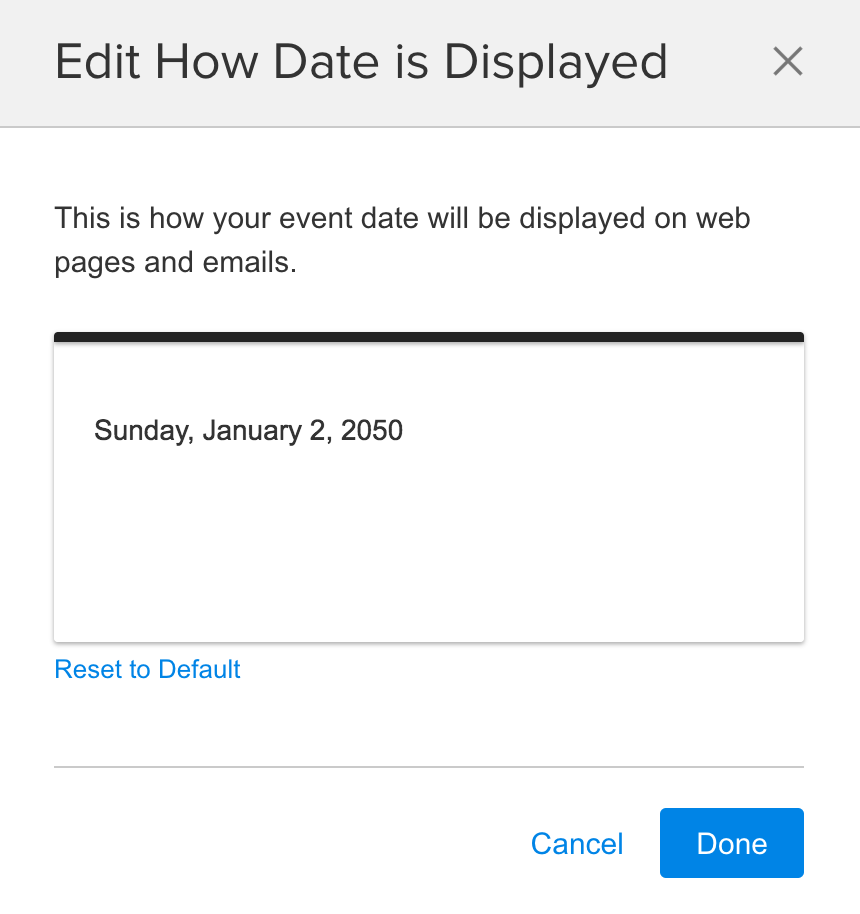
If you need more information than just the date and the time, click Edit below those fields to change how your date and time appears on your templates. Just type it in. To make a line break, add <br> where the line ends.
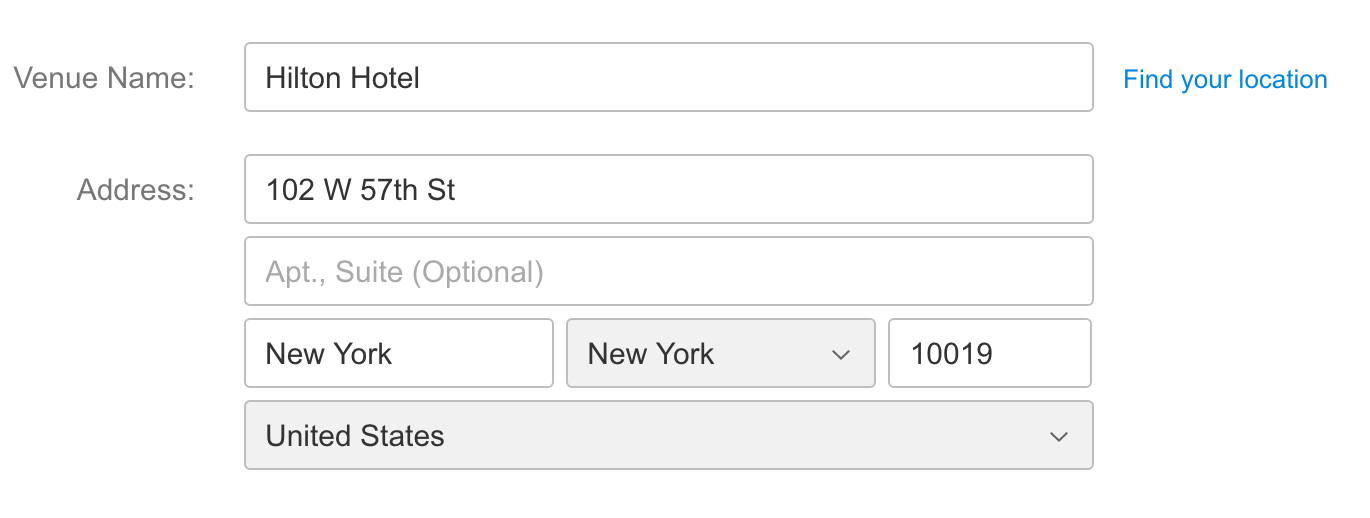
Location
Type in the location to use the Google lookup, or type in the location manually.
Parking Instructions
Promotional Information
Attendance Goal - Number of people you hope will attend your event. We'll use this number to show the registration progress on your dashboard.
Event Description - Since the variable for this section is automatically on your Event Web Page and Invitation email, what you add here will show on those templates.
Event Website link - the link to your website with more information about the event. When someone completes registration, this is the page they will be taken to. By default, we use your Website in your Account Information.
Donation Website - Attendance Only - the link for your own giving page. If you'd like to add a Give button to your invitation email, put the link for your giving page here, and the Give button will magically appear on your invitation template. Leave this blank if you don't want to have the Give button on your invitation email.
Show More Options - Attendance Only
Speaker Information
Master of Ceremonies
Points of Contact
Event Coordinator - This is the person primarily responsible for managing your event. They will receive all important email notifications about the event from FundEasy.
Event Contact Person - Appears as the main point of contact on all event web pages and emails.
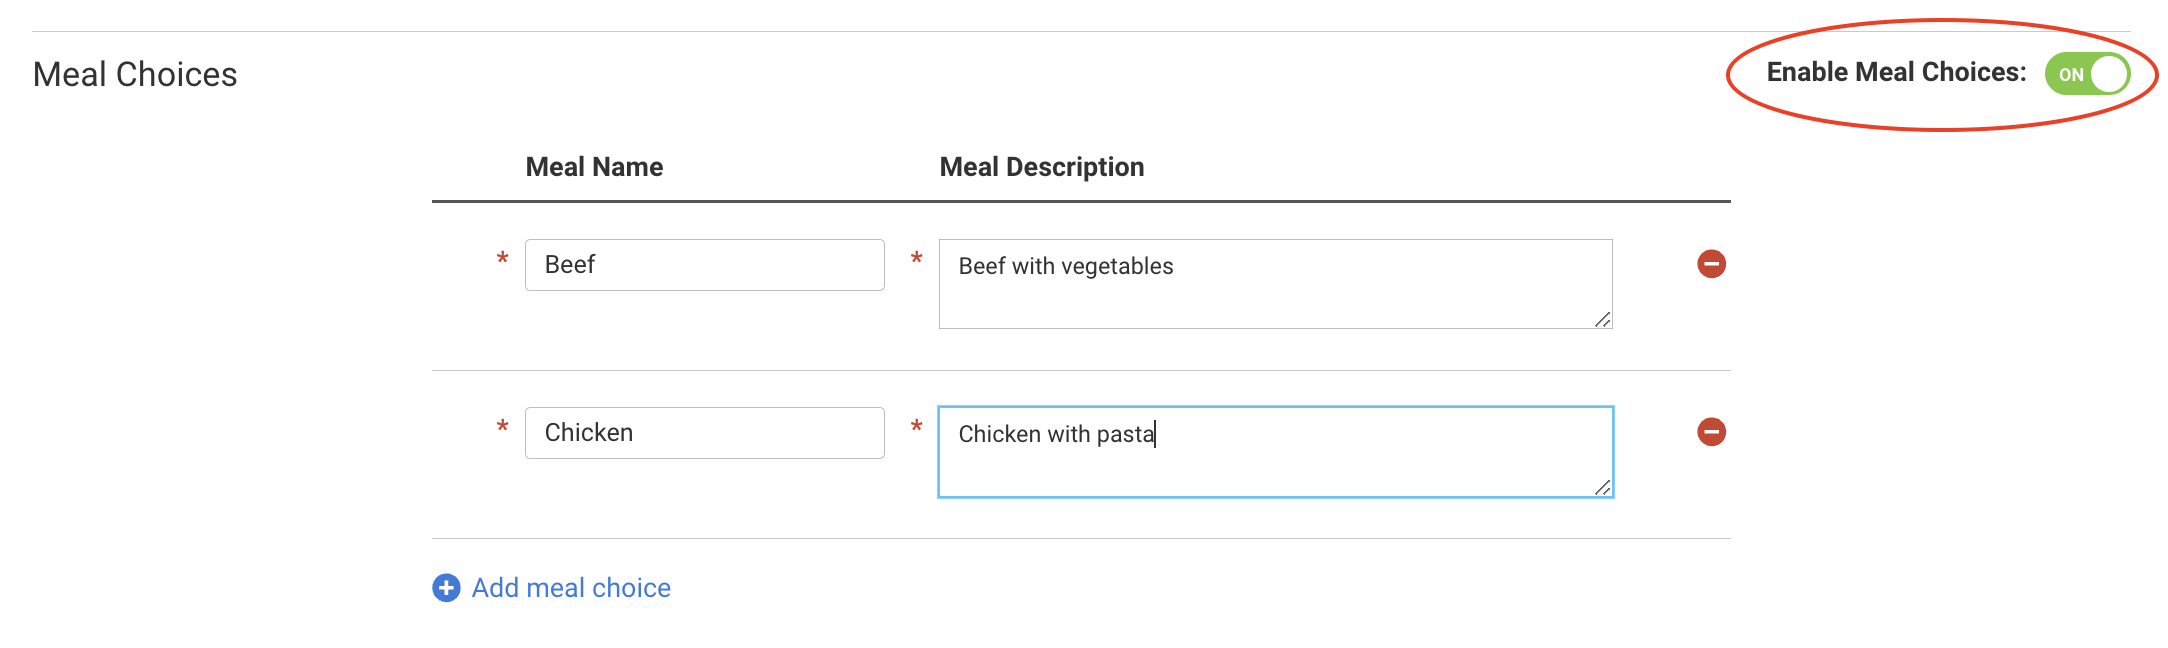
Meal Choices - List your meal options and descriptions for your menu options. Read more about editing and reporting on meal choices here.
Peer-to-Peer Only
In Peer-to-Peer you have these additional date and time options:
Does your event have a Shotgun Start? If you'd like your campaign to start on a specific date, check this box, select the "On" option for the Fundraising Start Date for All Participants, and choose a date and time. If you choose a start date, your participants can register for the event and set up their fundraising pages when the event is set up and open to the public, but their donors will not be able to make a donation until the start date.
Otherwise, choose the "Anytime" option for the Fundraising Start Date for All Participants if you want your participants to be able to start raising funds as soon as the campaign is set up and open to the public and they register to the event.All fundraising pages will eventually be taken down. By default, every page will remain active for one month after your Event. You can extend this length of time from the Fundraiser Pages Expire dropdown.

Event Website - This is the link for your own website or a different page with more information on your event. If you're a Young Life organization, this is where you'll put the link for your giving page. This article has more information for Young Life events.
Organization Information - Peer-to-Peer only
Public Organization Information - add a description of your organization which will appear on your Event Website and your participants' fundraising pages.
Organization Tax ID - We'll add this to your sponsor receipts, and let donors know their gift is tax deductible on your Peer-to-Peer donation pages.
Roles - Choose the terms you'll use for your Liaisons, Participants, and Sponsors.
Fundraising goals for event and for participants.
You can also give participants permission to change their goal from their fundraising page.