You can schedule emails to your registrants using the Send Email tool or from the chevron menu [V] in Manage Registrants.
Click on Send Email in the left toolbar.
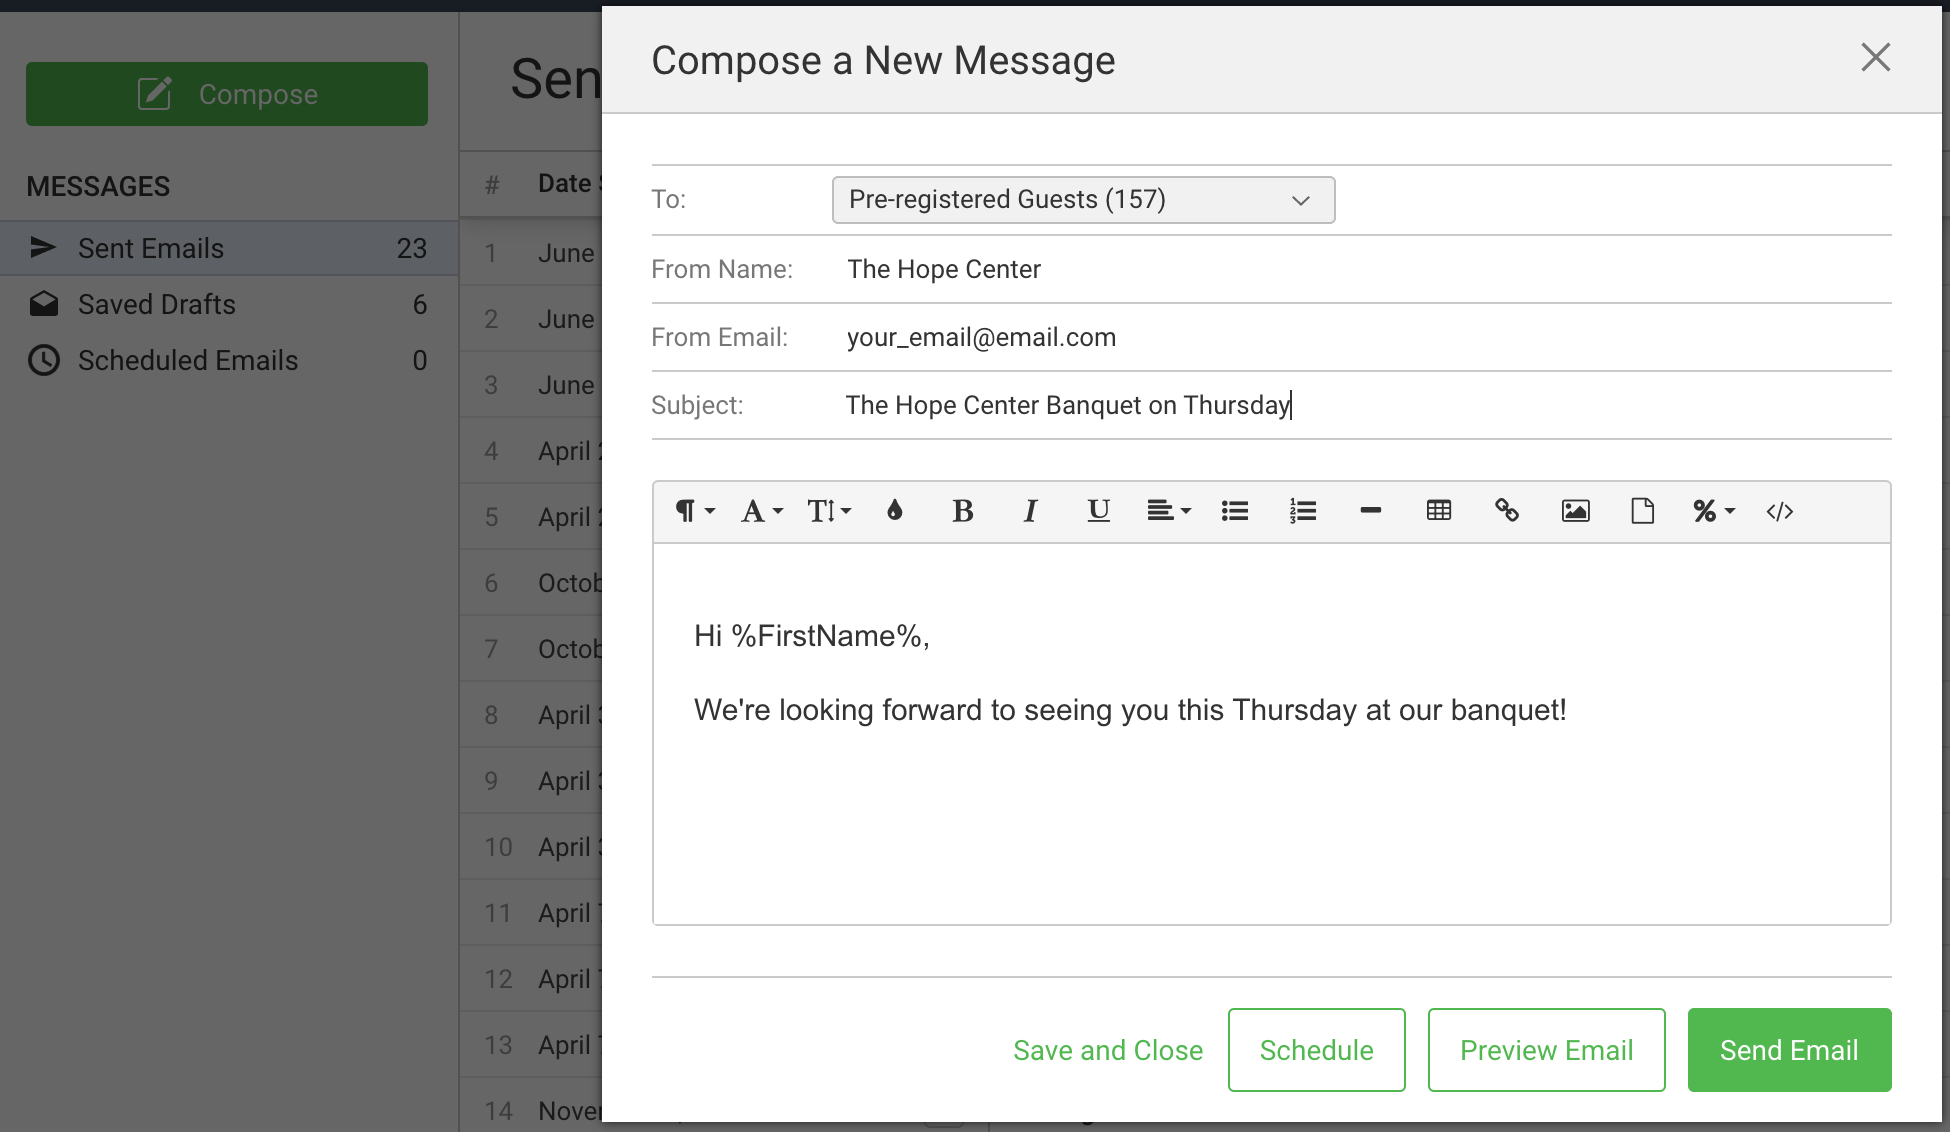
Select Compose and select who you would like to email in the To: field. This selected group updates as more people register to your event.
The Selection pulldown includes pre-registered guests, table hosts, cancelled and declined guests, and lets you segments for virtual and in-person guests in Hybrid events.
After your event, the selection also includes Attended and Not Attended Guest checked in through Live Check-In or the Express Self Check-In tool.
Next, write your subject line and email before you schedule the email.
Select Schedule and put in the date and time you would like the email to be sent in the pop-up. The time shown is in the timezone of the event. The Local time is the timezone of the person sending the email.
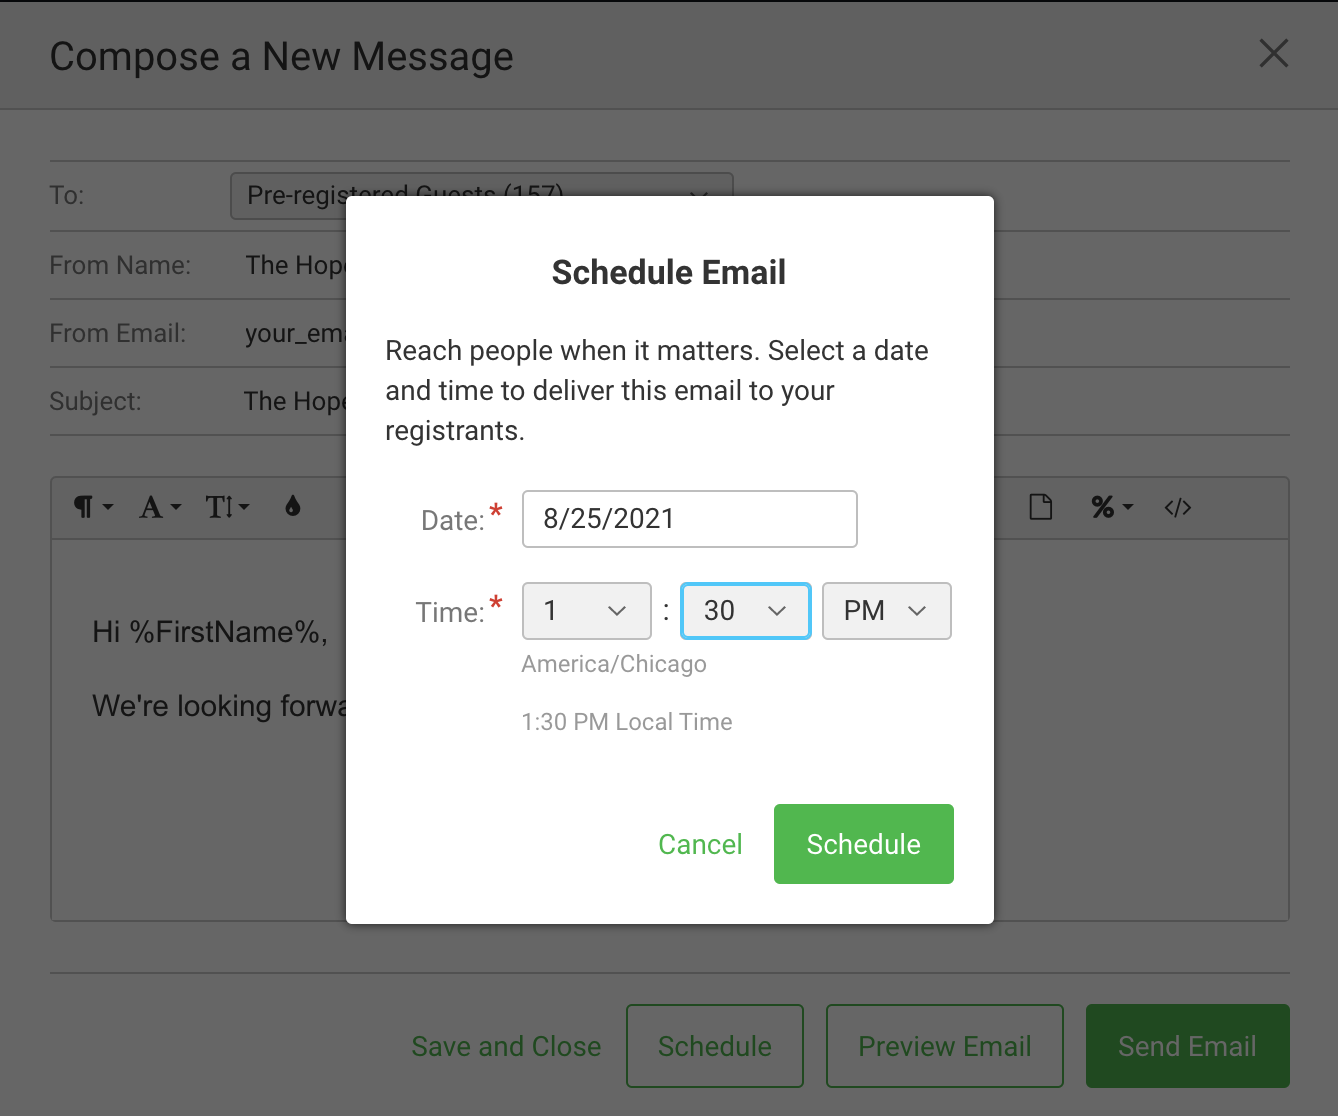
Click Schedule at the bottom of the modal window and the email will be sent at the time you chose.
If you need to make any changes to your scheduled email or change the date and time of delivery, you can access it from the Scheduled Emails folder. In this folder, locate the email you need to adjust. Click on the chevron icon to the right of the scheduled date and time.
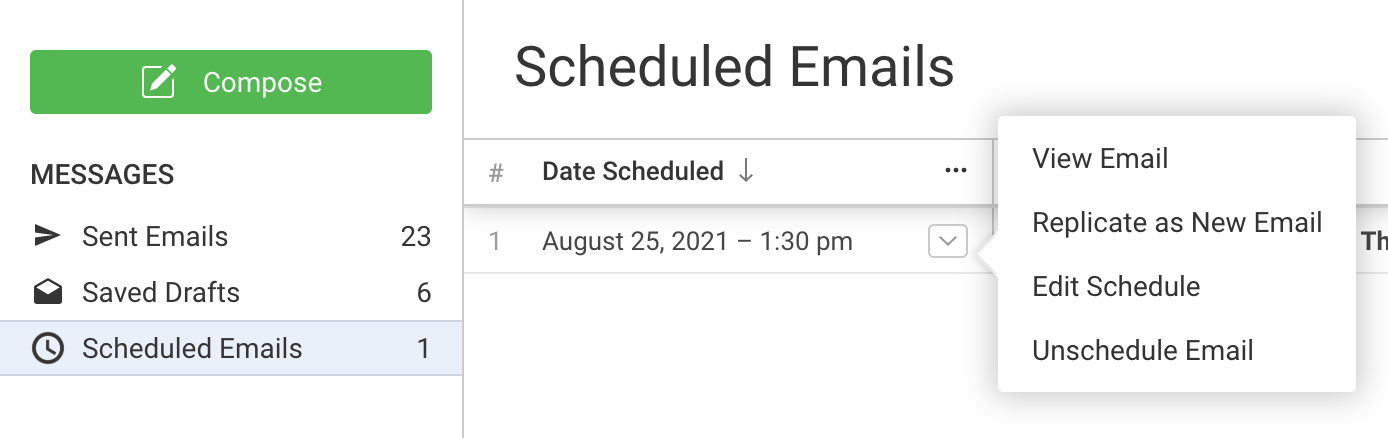
From this menu you can:
View the Email
Replicate as New Email
Edit the Schedule
Unschedule the email
If you unschedule the email, the email will then be moved to the Saved Drafts folder and can be edited from there.