Emails can only be sent to people in your FundEasy database; invitations can be sent to anyone.
This article covers tools in these sections:
Using the chevron [ V ] menu in Manage Registrants
Compose a new message
Resend Registration Confirmation Email
Resend Host Instruction Email
Invite to a different event
Using the Bulk Actions Menu in Manage Registrants
Compose a new message
Resend Registration Confirmation Email
Resend Host Instruction Email
Invite to a different event
Sending Emails Using the Event Tools Menu
Peer-to-Peer/Attendance Training Video: Send Email
(Read video transcript here.)
Choose Send Email from the Event Tools Menu on the left.
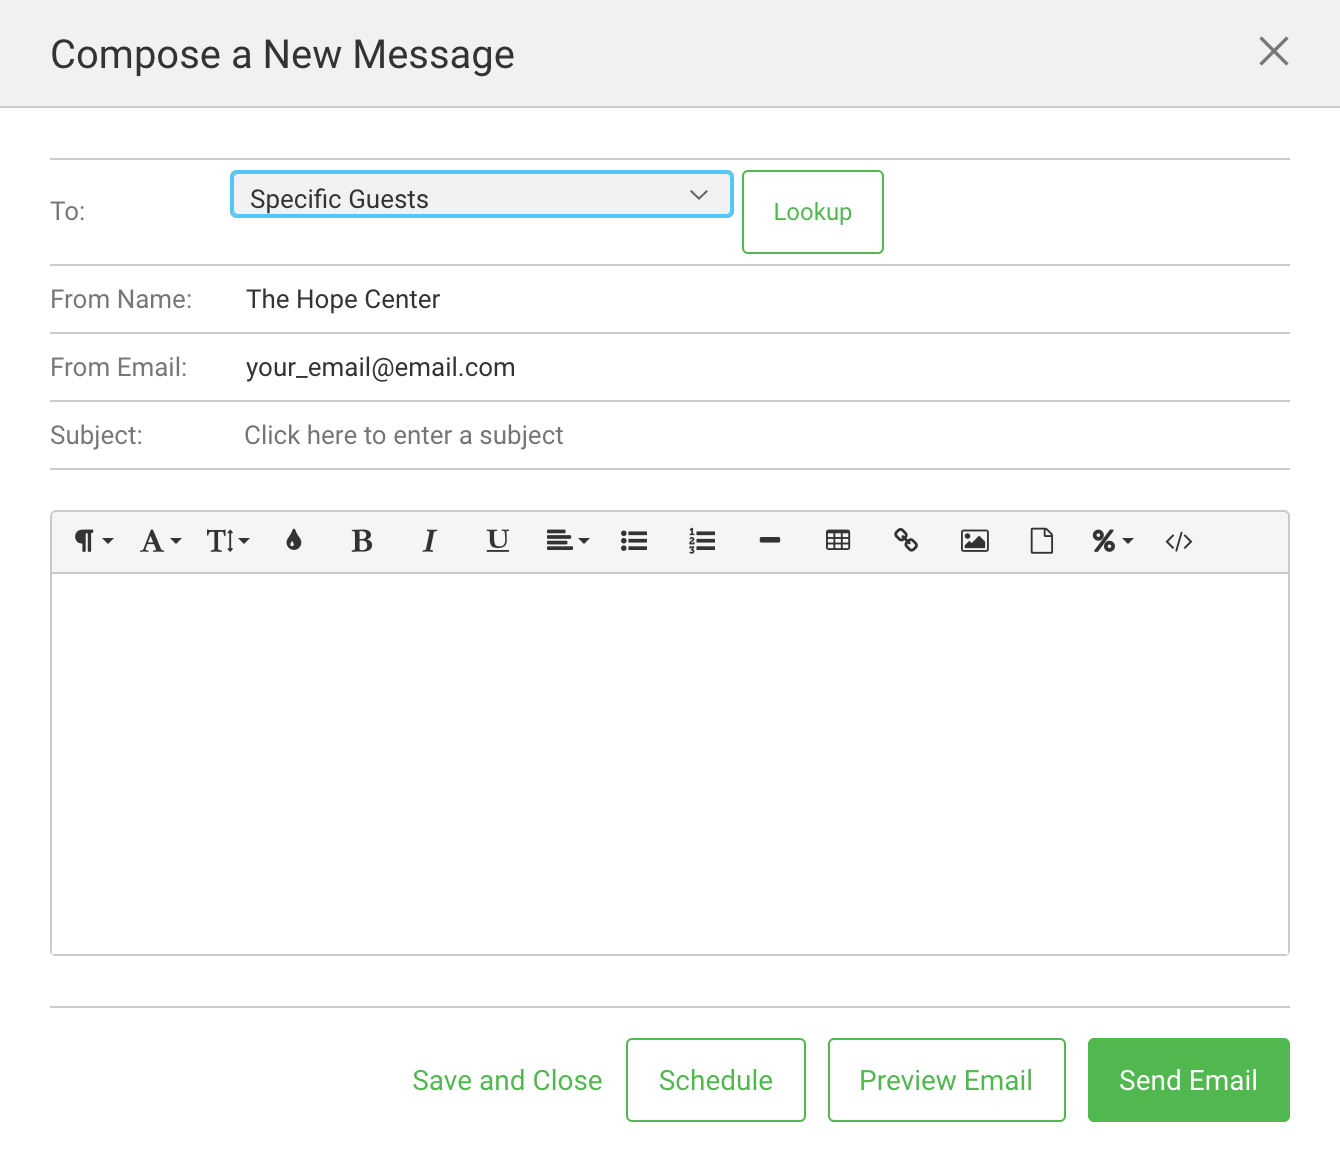
Click the Compose button.
Select the audience for your email from the drop-down menu.
Specific Registrants from your event database.
Pre-registered Guests (including hosts) who you expect to attend your event. This does not include Cancelled or Declined Guests. They can be emailed separately (see below).
Cancelled Guests whose plans changed after registering.
Declined Guests who declined the initial invitation.
(For hybrid events) In-Person Guests (including hosts) who registered to attend your event in-person.
(For hybrid events) Virtual Guests (including hosts) who registered to attend your event virtually.
Group Hosts registered as a host for this event (regardless of if their name is on the group title or not).
Guests Who Attended- used AFTER your event and includes anyone marked as attended.
Guests Not Attended -used AFTER your event and includes anyone not marked as attended. This does not include Cancelled or Declined.
The From Name defaults to your organization’s name; you can change it if you wish. This is what the recipient will see in their inbox.
From Email defaults to the email address of this event’s contact person; you can change it if you wish. The address in this field will be used as the reply-to address.
Type in the Subject.
Add the body of your email in the white box.
Important Note: Copy/pasting text into the Personalized Note section prior to sending the invite can result in failed email delivery. This is due to extra formatting that may not be visible in the text itself. We suggest manually typing text or run the text through a text cleaner first to clear any hidden formatting that may be causing the problem. You may also want to remove emojis in the text as that could break it too.
It’s a good idea to preview the email before you send it. Click Preview Email.
You can choose to schedule the email to be sent at a later date/time by clicking the Schedule button. Or you can click the Send Email button to send the email immediately.
You'll be able to see the email history in Sent Emails.
If you click the Save and Close link, a draft will be saved in Saved Drafts in Send Email until you send the email.
Selecting Registrants from the Compose modal.
Choose Specific Registrants from the drop-down menu.
Click Lookup to select the people you want to email.
This opens a search window. Type the name of the person you'd like to send an email.
If they are not already highlighted, choose the person in the list.
Click Select Registrant.
Repeat as necessary.
Saved Drafts:
You can see the email drafts that you have saved from Send Email > Saved Drafts.
When you compose an email and click Save and Close, your drafts will appear here.
Click the subject line or click the chevron [v] and choose the Edit option to open the draft to continue working on it.
Once you have sent the email, the draft will no longer appear in this list. It will move to Sent Emails.
If you want to delete a saved draft, click the chevron [v] and choose the Delete option.
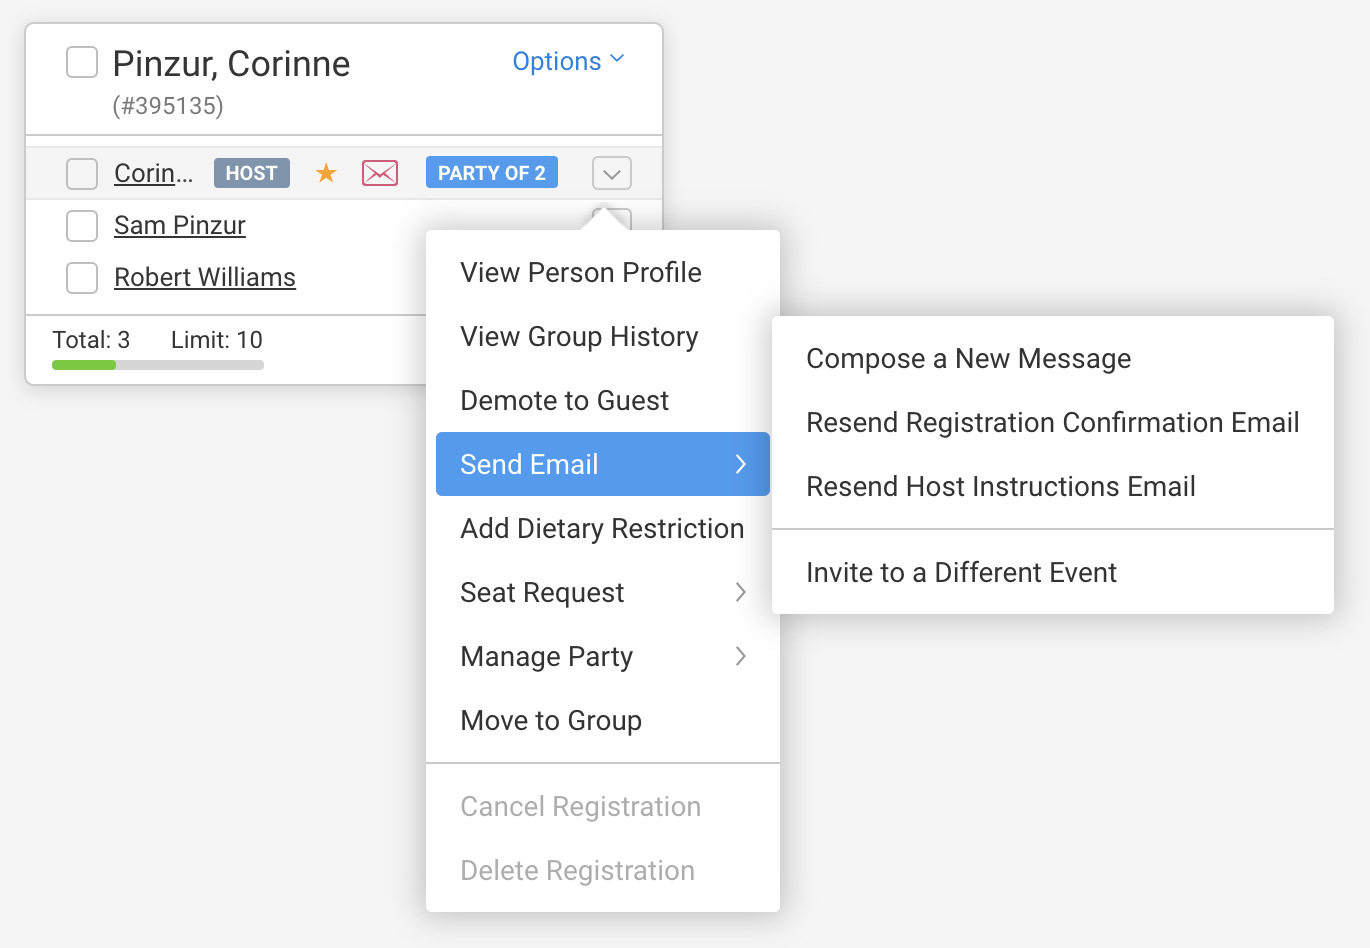
Using the chevron [v] menu in Manage Registrants
Choose Manage Registrants from the Event Tools Menu on the left.
Click the chevron [v] button next to the name of the person you want to email.
Choose the type of email you want to send.
Compose a New Message - this opens the Send Email tool
Resend Registration Confirmation Email
Resend Host Instructions Email for your hosts
Invite to a Different Event
If the registrant doesn't have an email address, Send Email will be grayed out.
Drafts saved in this modal (window) will be saved in Send Email > Saved Drafts.
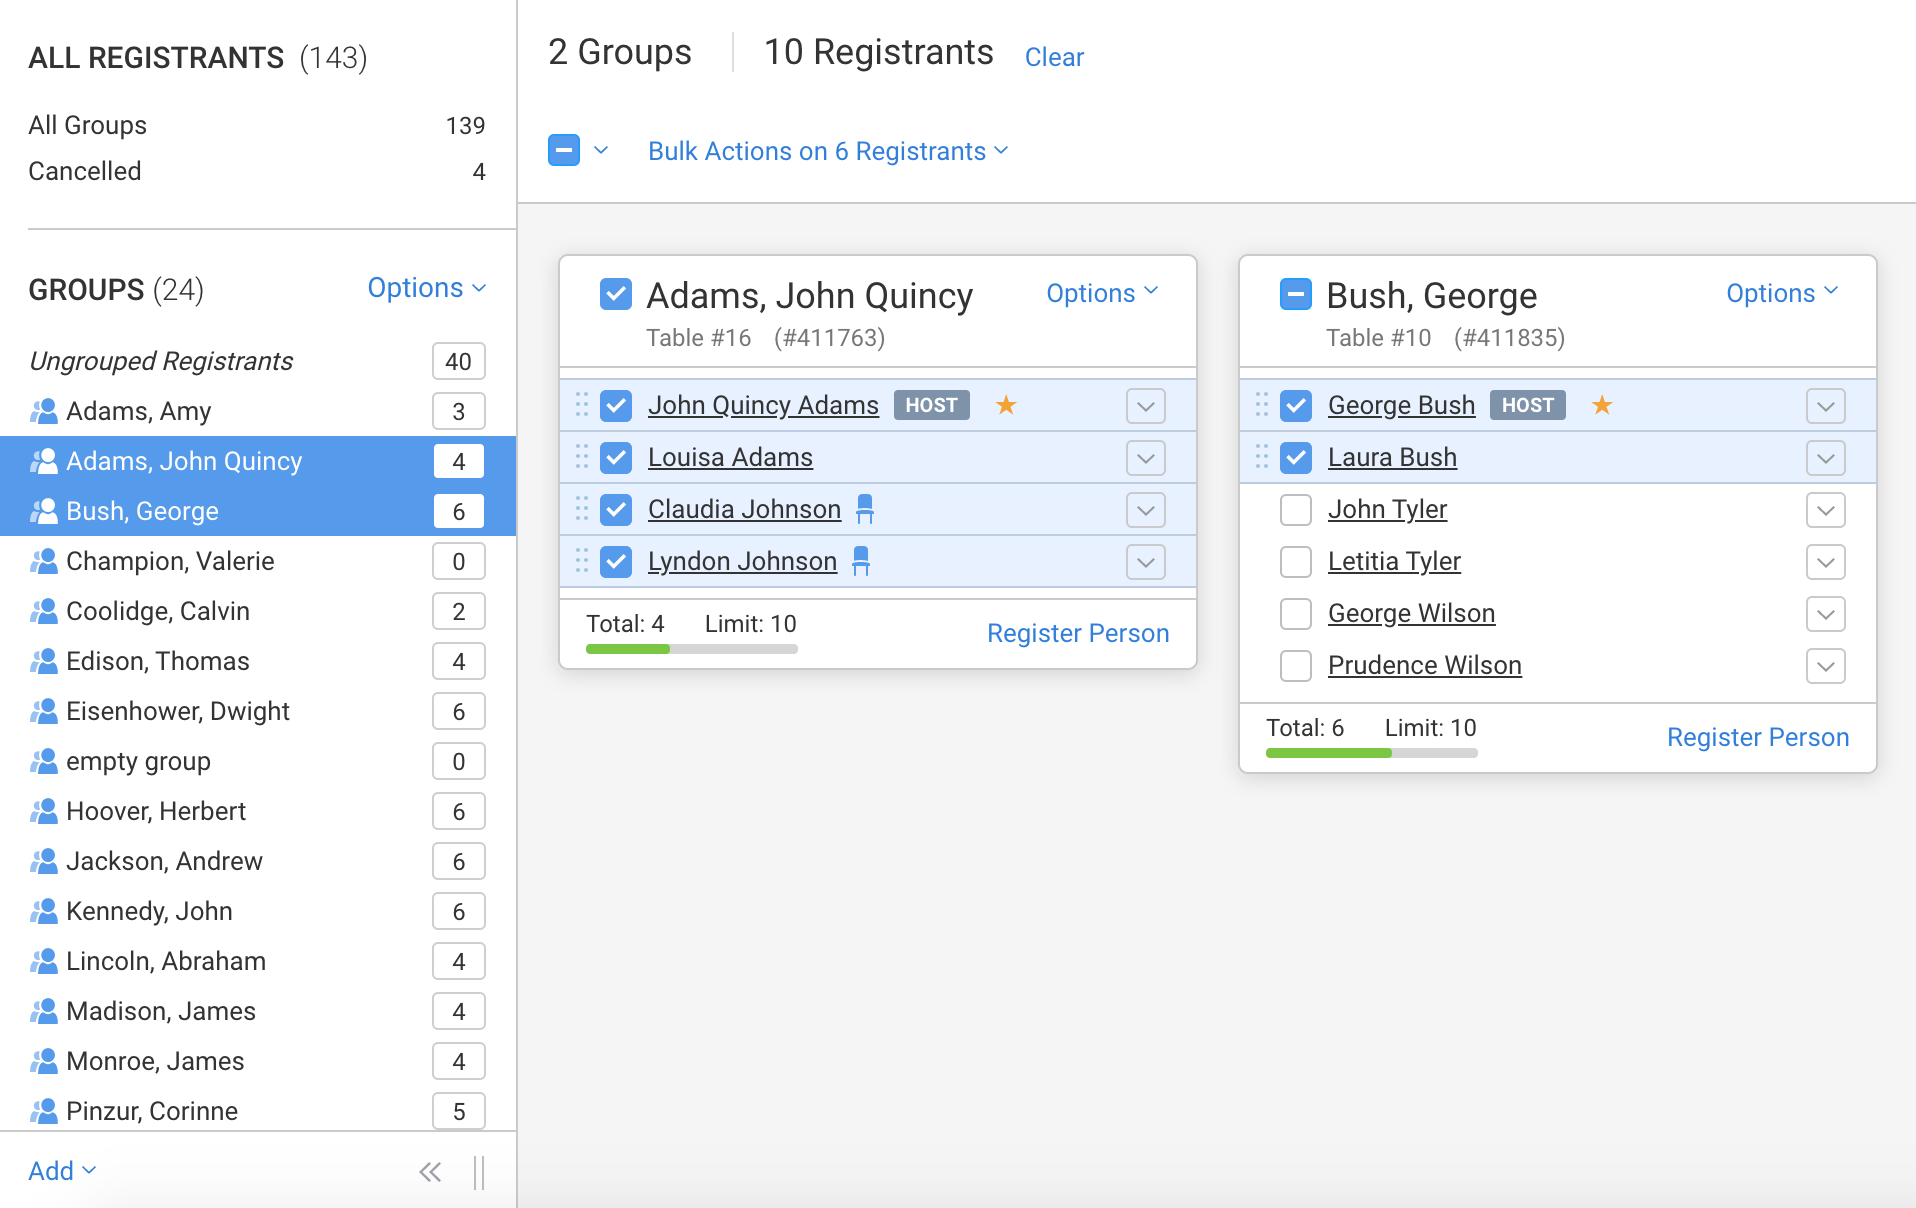
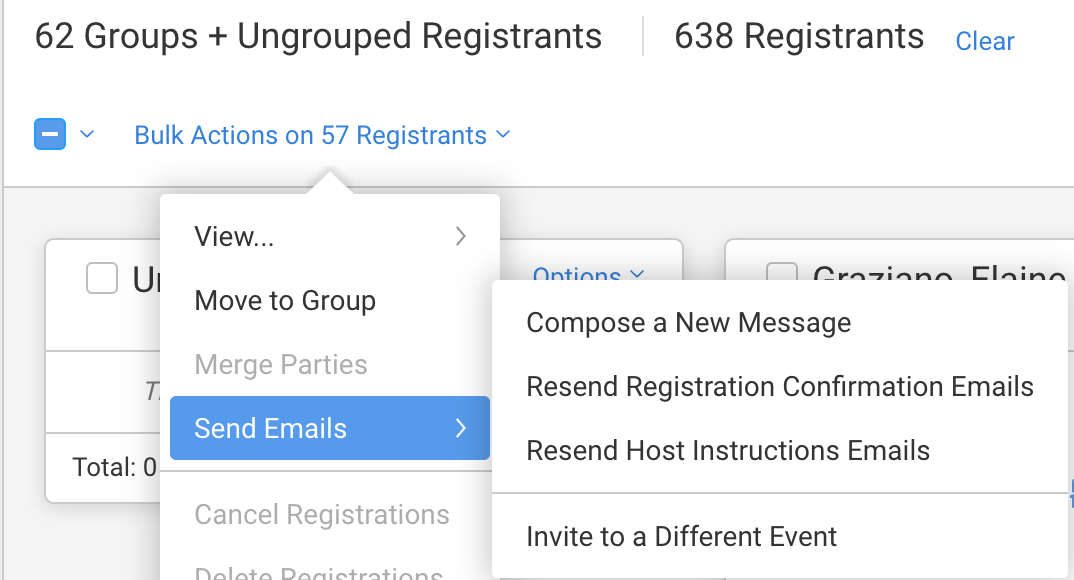
Using the Bulk Actions Menu in Manage Registrants
Choose Manage Registrants in the Event Tools Menu on the left
Select the individuals or Group(s) you'd like to email.
If you're choosing specific Groups, clicking the name of the Groups will add those groups to the main part of the page. Clicking the number of people in the Group opens just one Group.
You can choose All Registrants, Hosts, or Guests by clicking the Bulk Actions checkbox. For hybrid events, you can also choose In-Person or Virtual guests.
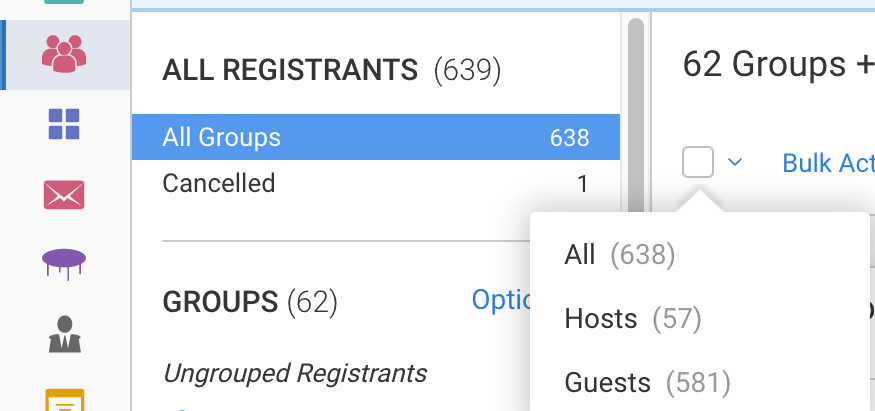
Click the Bulk Actions link above the Groups to open the list of options. Mouse over Send Emails to see your mailing options.
You will be alerted when someone you have chosen does not have an email address.
Drafts saved in this modal (window) will be saved in Send Email > Saved Drafts.
Tip: If you want to compose a new email to all Group Hosts or all Pre-registered Guests, you can also use Send Email from the Event Tools Menu.