The link to Manage Registrants is in the Event Tools Navigation Menu on the left side of your screen.
Groups are listed in the second column. As with all sidebar menus, you can expand or collapse them for more room on your screen by clicking the white space or arrows near the bottom of each column.
From here you can select and view:
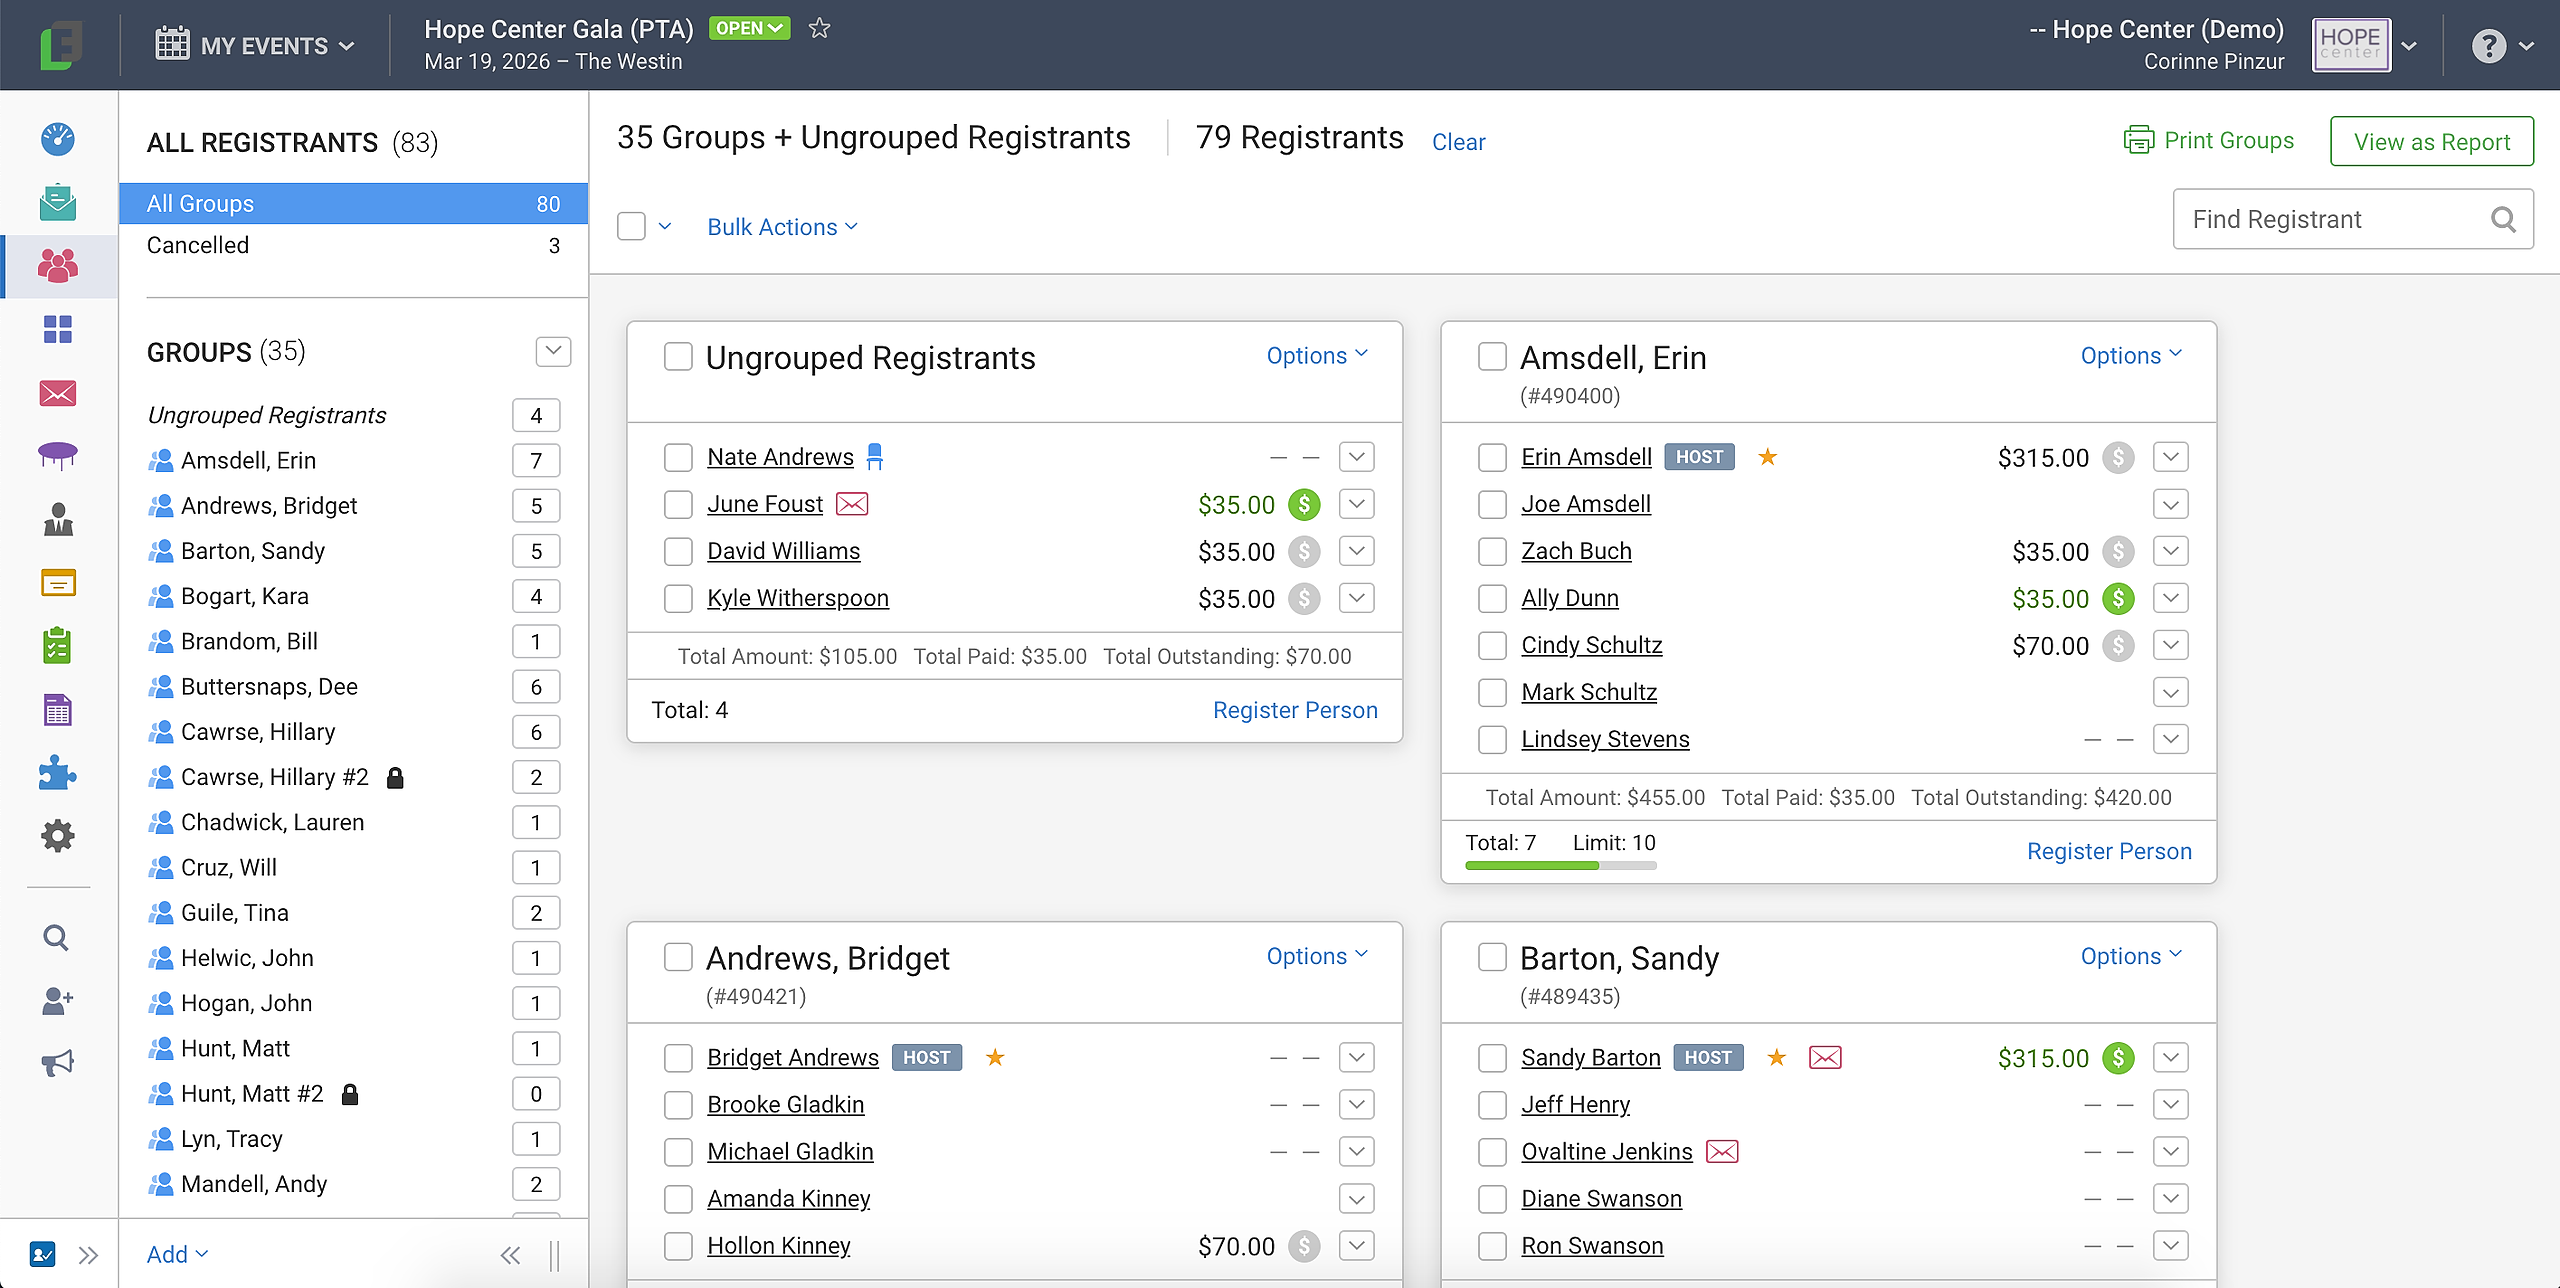
All Groups - This shows all of the Groups in your event, and all the registrants in those Groups.
Cancelled - These are those who were registered but who have cancelled.
Groups - Select individual groups to view.
Ungrouped Registrants - This shows the registrants who haven't been assigned to a Group.
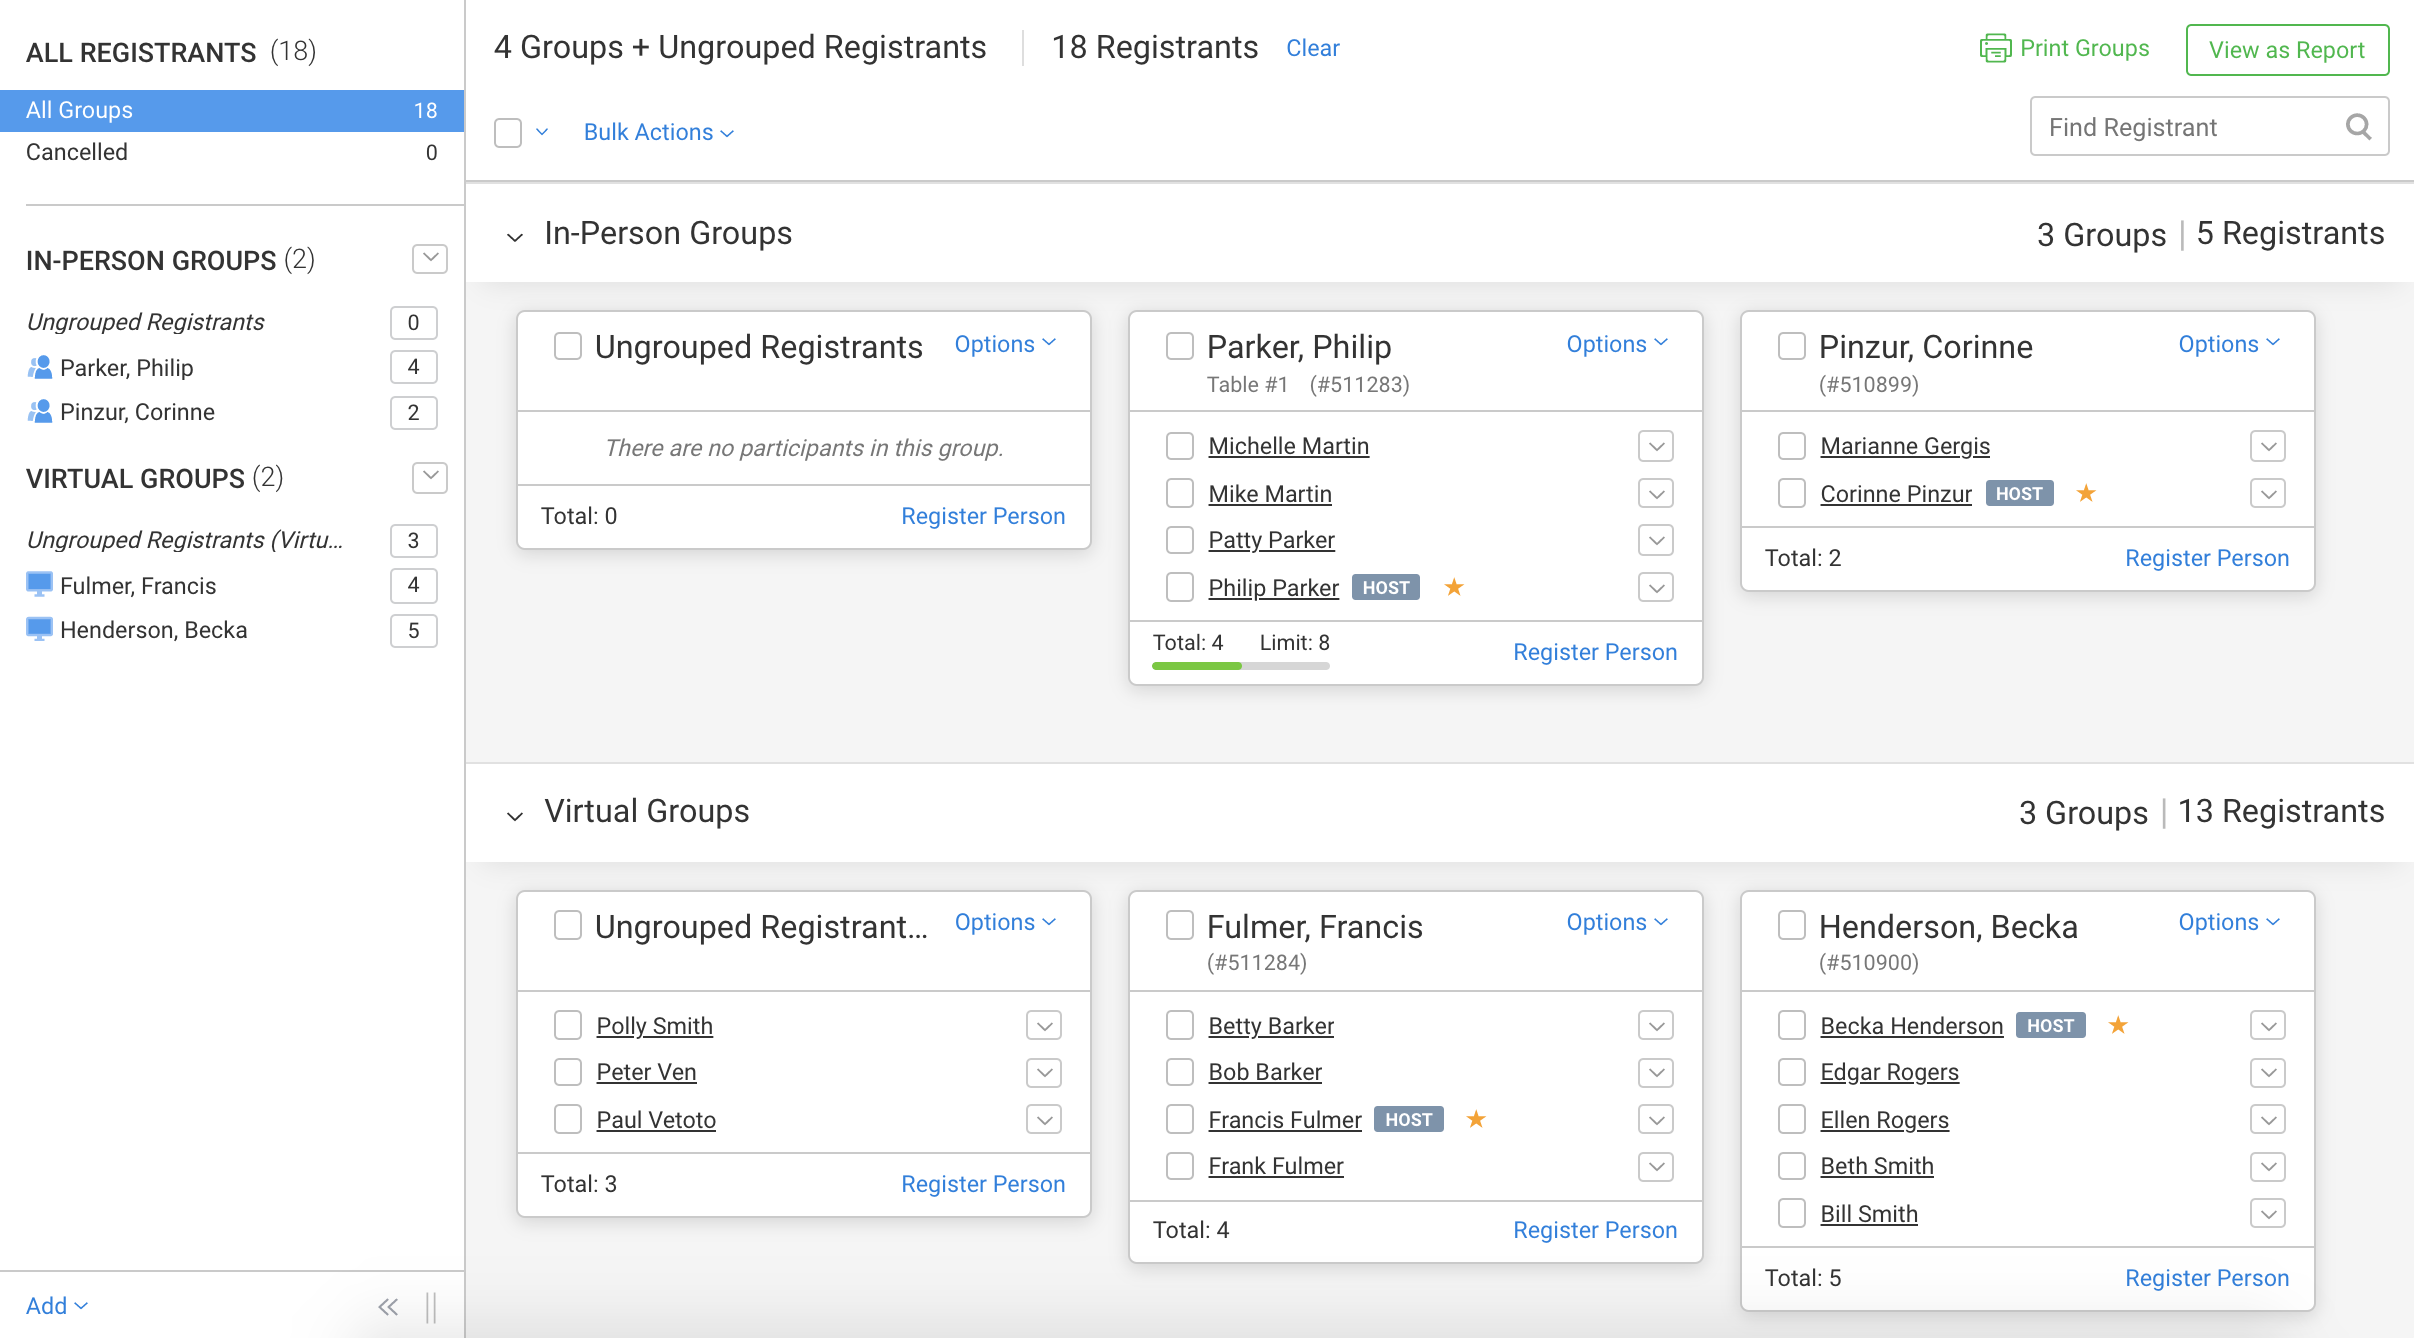
For hybrid events, in-person and virtual Groups are shown in separate sections.
Note: Declined Members are located in Email Invitations > Declined Invitations.
Groups
View all the groups from the All Groups option, or select specific groups to view.
Click the number of the group to put an individual group into the middle of the canvas
Click the name of one or more groups to add multiple groups to the canvas.
To move people between groups you can drag and drop, or use the Bulk Actions link toward the top of the page.
Smart Groups allow you to use the information-gathering features of the Custom Report Builder in conjunction with Manage Registrants. Smart Groups are under construction and will need to be created and edited from the Group Manager (old) page in the Event Tools navigation panel on the left. This article has more information about Smart Groups.
Registrants
In Pay-to-Attend events we show payment icons to the right of registrants' names:
Green dollar amount and dollar sign indicate that the invoice has been paid.
Grey dollar amount and dollar sign indicate that the invoice has a balance due.
Grey horizontal lines indicate that there is no invoice.
No icon or horizontal lines indicates the person is on the same invoice as someone who paid for them. This is how people who registered and paid at the same time and are in the same party will appear.
You can record payments for registrants by clicking the payment icon to the right of their names. This article has more information.
Party tags show to the right of the name of guests when you mouse over their row. You can click the party tag to edit their party or to split them from their party quickly. Checking the box next to someone's name also checks everyone in the same party. More information on parties is available here.
Chevron [v] Menus
We've added chevron [v] menus throughout the app. Click the chevron [v] button to the right of an item to see the tools that are available in that menu.
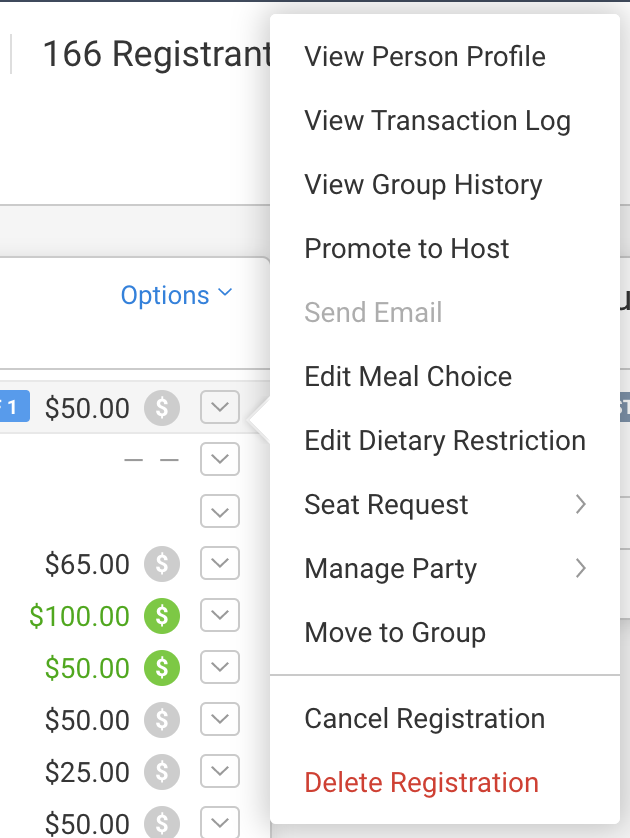
View
Person Profile
The registrant's transactions in pay-to-attend events
Group History - this option will show you the Groups that the registrant has previously been in, when and where the registrant was moved, and who moved them.
Promote/Demote a Host
Use this option to make this person a host or to demote to a regular guest.
When promoting, you can also make the host the Main Contact for the Group.
Send Email
Compose a New Email
Resend Registration Confirmation Email
Resend Host Instructions Email (for hosts)
Invite to a different event
Edit Meal Choice (if enabled)
Edit Dietary Restriction
Add and manage Seat Request
Move to Group (this option will show a video about how to move a registrant to a different group)
Cancel a Registration
Cancelling a registration moves the registrant and their payment (if applicable) to the Cancelled category on the Manage Registrants page, where the registration can be restored in the future, if needed.
Cancelling a registrant does NOT refund their payment. For instructions on refunding a payment, please see this article.
Delete a Registration
Deleting a registration removes the registrant from the system completely; this cannot be undone.
This option is best for duplicates or test registrations that you don't need to keep a record of.
If the person has made a payment, you will need to mark it as Refunded before you can permanently delete them. For instructions on refunding a payment, please see this article.
Bulk Actions Pulldown
Use The Bulk Actions tool at the top of Manage Registrants to perform actions on several people at a time.
Click All Groups at the top of Manage Registrants to work with all groups
Or click the name of the group(s) you'd like to work with from the Groups list.
Once the groups are selected, click the box next to Bulk Actions. This will check the boxes next to your registrants' names who are in the center part of the page. You can choose:
All - to select all registrants
Hosts - to select all hosts
Guests - to select all guests (not including hosts)
(for hybrid events only) In-Person - to select all in-person registrants
(for hybrid events only) Virtual - to select all virtual registrants
From the Bulk Actions link, you can:
View Group History
Move to Group
Merge Parties
Send Emails
Compose a New Email
Resend Registration Confirmation Email
Resend Host Instructions Email (for hosts)
Invite to a different event
Cancel Registrations
Delete Registrations
View as Report
The View as Report link in the upper right corner provides a quick report of everyone in the selected group(s) that are showing in the center of the canvas. This replaces the Attending List. From this report link, you can create and export a custom report or quickly edit a meal choice.
The View as Report link features tools to Change Columns, Sort Columns, and Export like the Custom Report Builder, but it does not include options for saving the report.
Attendance Training Video: Manage Registrants
(Read video transcript here.)