Register a new host
Create a new group without registering a new host
How do hosts manage more than one group?
Promote guests to hosts
Main Contacts
Move hosts from one group to another
Cancel or demote a host
Register a New Host
To register someone as a host from the admin side of FundEasy, click the Register Person icon in the bottom of the Event Tools Menu on the left then on the modal window choose Host. This will register them to the event, send them the Host Manager email, and create their group.

Create a New Group Without Registering a New Host
Not all groups need to have a host. You can create a new group when you have a host who is managing more than one group, or if you have a group that doesn't have a host.
Click the chevron [v] button at the top of the Groups list, or click Add at the bottom of the Groups column.
Note: In hybrid events, you can click the chevron [v] above the In-Person Groups or the chevron [v] above the Virtual Groups.
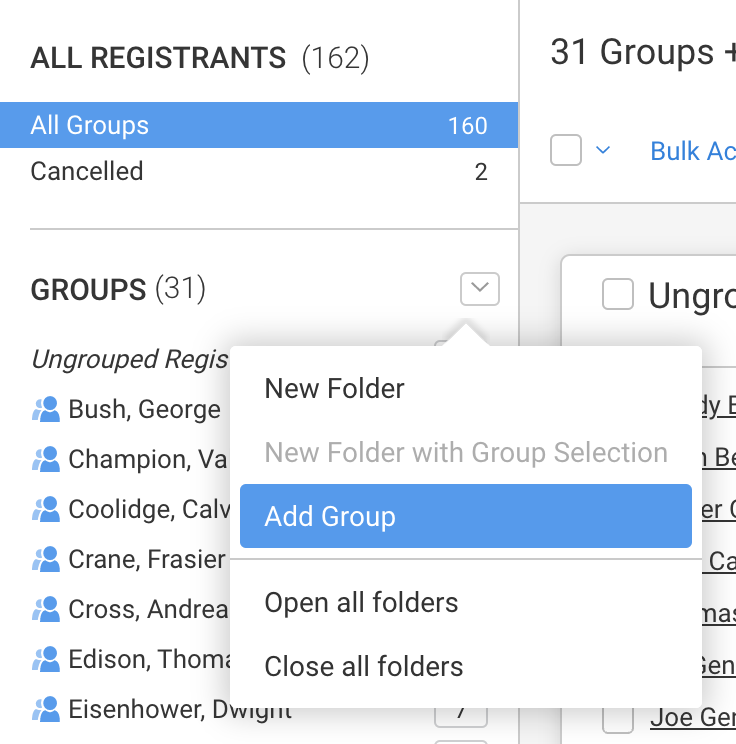
Click Add Group. This will open a modal window.
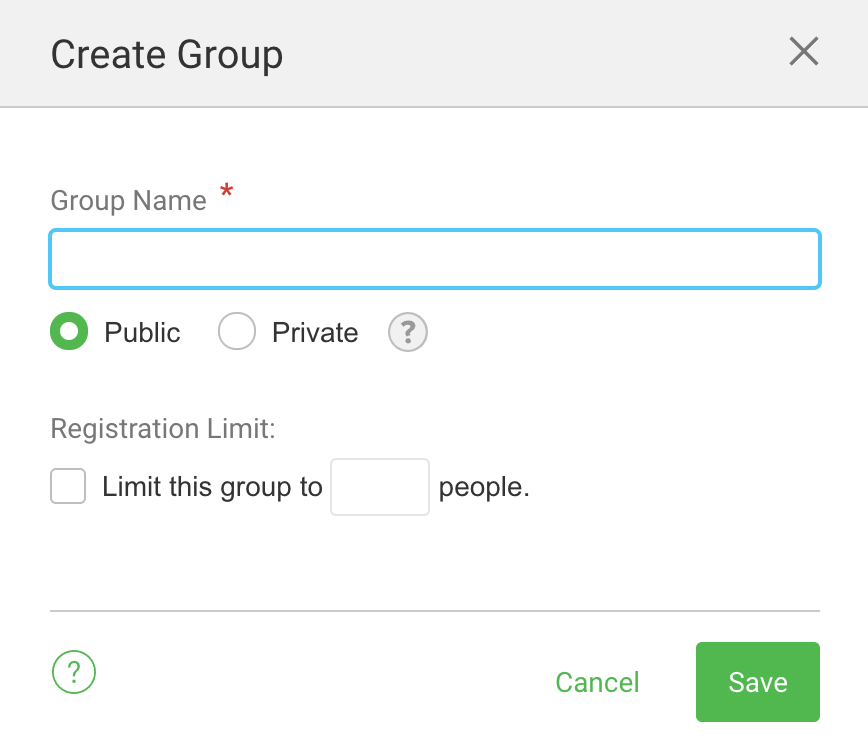
Type in a new group title.
You also have the option to make a group private to hide it on the Registration Form
If you are using folders in your event, there will be a dropdown to choose the folder.
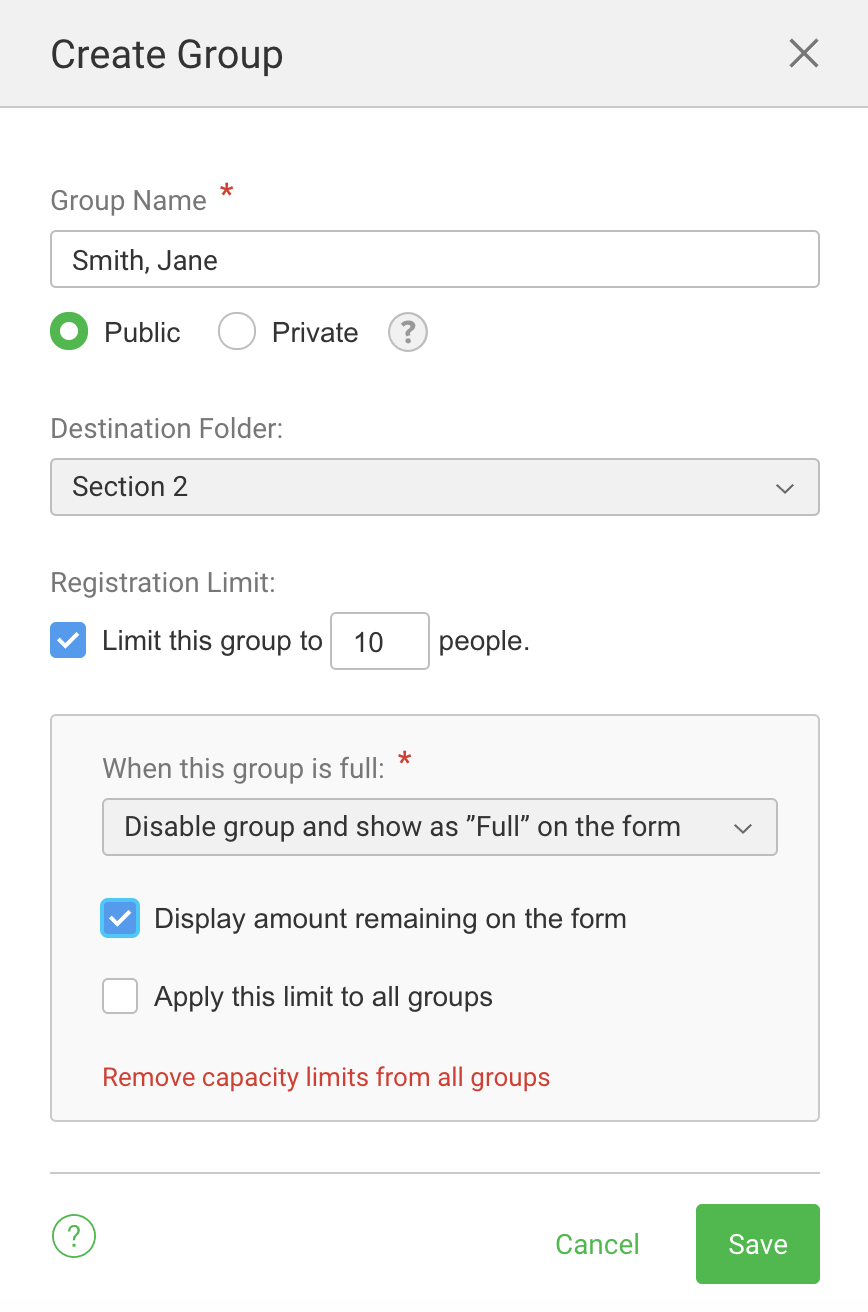
Group Limits show on the bottom of each Group. If you need to set or edit a group limit you can add the limit and add instructions on how the registration form will handle a registration when the limit is reached.
In hybrid events, you can choose to make the group a Virtual Group, which will put it in the Virtual Groups section on the Manage Registrants page. Leave that option unchecked to make the group an In-Person Group.
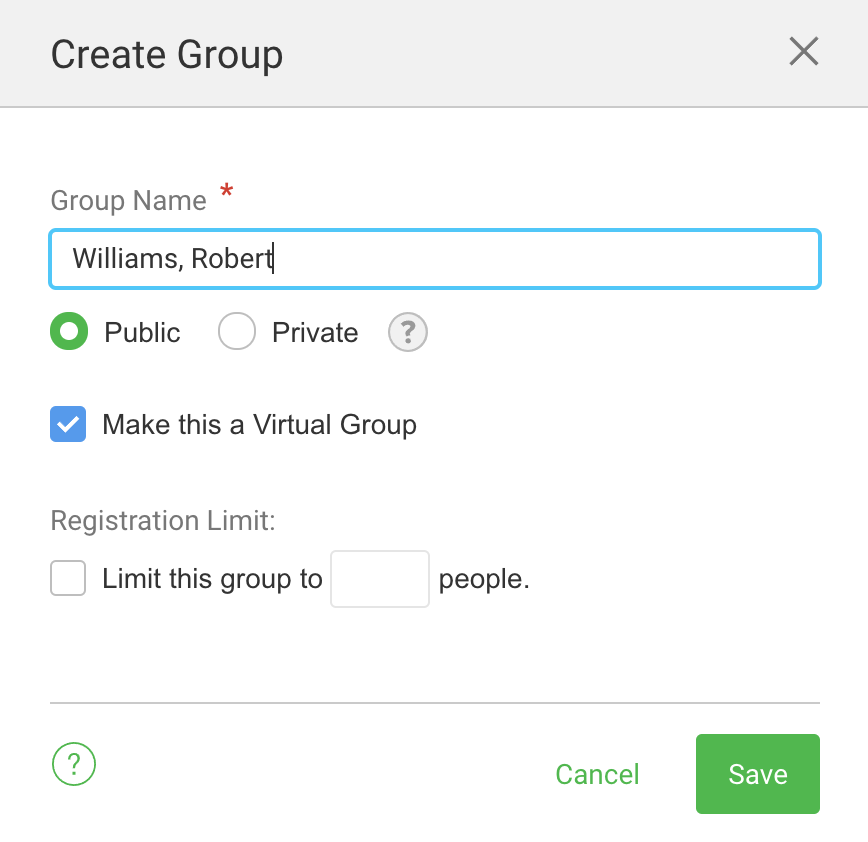
Click Save.
Smart Groups allow you to use the information-gathering features of the Custom Report Builder in conjunction with Manage Registrants. Smart Groups are under construction and will need to be created and edited from the Group Manager (old) page in the Event Tools navigation panel on the left. This article has more information about Smart Groups.
To edit a group later, click Options > Edit Group in the top right corner of the group.
Promote a Guest to Host
You can make an already-registered guest a host by using the promote option in the chevron [v] button menu next to their name. Groups can have more than one host.
Click the chevron [v] button next to their name.
Click the option to make them a host. This will open the Promote to Host window.
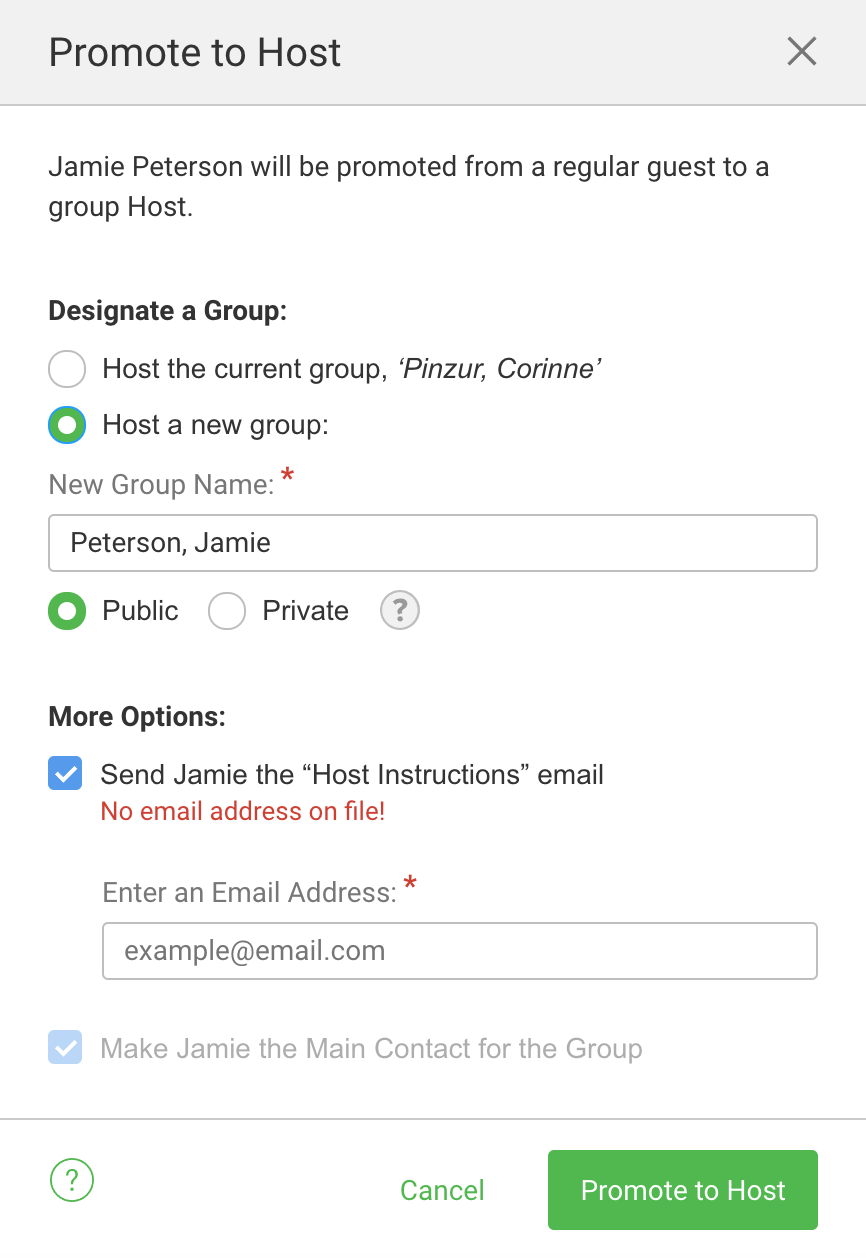
Select whether they will host the group they are currently in or if they will be the host of a new group.
If they will be hosting a new group, you can name the group from the same window. When promoting someone from Ungrouped Registrants, the new group will be created with the group name you add in this window.
The host will automatically receive the Host Manager email unless you uncheck the Send Host Instructions box. If there isn't an email address in their profile, you'll be able to add one from here.
If you're promoting the guest to be an additional host in an already-hosted group, check the Main Contact box if another host is the Main Contact for the group and you want the new host to be the Main Contact instead. (This option is only available if another host is already the Main Contact for the group; otherwise, the new host will automatically become the Main Contact.)
If you need to demote a host, click the chevron [v] button next to their name and then click Demote to Guest.
Main Contacts
The host of a new group is automatically the Main Contact for the group. Generally, this person is considered to be the group contact. The Main Contact for the group is indicated by a star next to their name.
Groups can have more than one host, but only one person can be the Main Contact. So when you're promoting someone to be the host of a group, leave the Main Contact box unchecked if this person will not be the main contact.
Rename, Edit, or Delete a Group
Click the Group's Name in the Groups list on the left.
Double-click the name of the Group in the main part of the page to edit the Group's name.
Click the Options link in the top right corner of the Group to access the Group Tools.
Choose Edit Group.
Change the name of the group in the text box. Changing the name here also changes how it is listed in the group list on the Registration Form. (The name of the Group can also be edited by double-clicking on the name at the top of the Group.)
You also have the option to make a Group private to hide it on the Registration Form, make the Group a Virtual Group (for hybrid events only), select a folder for the Group to be in, and add/edit group limits.
Choose Delete Group to delete the Group.
If the Group is empty, the Group will be deleted.
If the Group has members, the option to delete the Group will be disabled. You'll need to move everyone out of the Group before you can delete it.
Move a Host
You can move people between groups from the Action pulldown or by dragging and dropping them from their group to their new group. This article covers moving people in more detail. When you move someone from one group to another, you have the option to send a notification email to those hosts to let them know their group has been changed. This is turned on by default, but can be disabled in Event Preferences.
When you move hosts to other groups, you should be aware of these things:
Hosts will get new group and table assignments.
The host will need a new host manager email to manage their new group.
Hosts may lose their main contact status.
The name of the current group and the name of the group they are moving to will not change automatically. If you need to edit a group name, double-click on the name of the group or click the Options link in the top right corner of the group and choose Edit Group.
Remember not all groups need to have a host. If your host is managing more than one table, leave all their guests in one group so they can manage their group with the same email. After you close your event, you can split the group into multiple groups under the host's name, but with the host only in one group.
If you need to move one person, and others are checked too, you need to break up their party. You can do that from the chevron menu [V] or by mousing over their name and then clicking the party tag.
Demote or Cancel a Host
Before canceling a host's registration you must first demote them.
Click the chevron [v] button next to the host's name.
Choose Demote to Guest.
Confirm that you're demoting this host. Host will be demoted.
The name of the group will remain the same. If you need to rename the group, double-click on the name of the group or click the Options link in the upper right corner of the group.
To cancel the host, click the chevron [v] button next to the host's name and click Cancel Registration. This will move them to the Cancelled list. Note: if the host has made a payment, their payment will follow them to the Cancelled category and will no longer show in the group total. Cancelling a host will NOT refund their payment.