There are two steps to creating the Table Chart. The first is to design the Table Chart to match the seating arrangement at your venue. Once your Table Chart is set up, you are ready to assign Groups to tables on the chart. Remember, if you need to move people within the Groups, you'll do that from Manage Registrants.
Designing your Table Chart
Creating your Table Chart
Attendance Training Video: Table Chart
(Read video transcript here).
Click the Table Chart icon in the left Event Tools navigation menu.
Enter the number of tables on the longest row, and the number of rows.
Note: To stagger tables, you'll use twice as many tables in the first row as you need and then leave every other table number blank.Enter the default number of seats per table. You can customize this on the Table Chart.
Click Continue to see your Table Chart.
Editing your Table Chart
Click the Edit link in the upper right corner to edit table placement, renumber tables, adjust table limits, etc.
To edit the table placement, change, move, or delete the table numbers. When deleting the number, use the delete or backspace key on your keyboard, not the spacebar. Note: For staggered tables, use twice as many tables in the longest row as you need and then leave every other table space blank. (see image below)
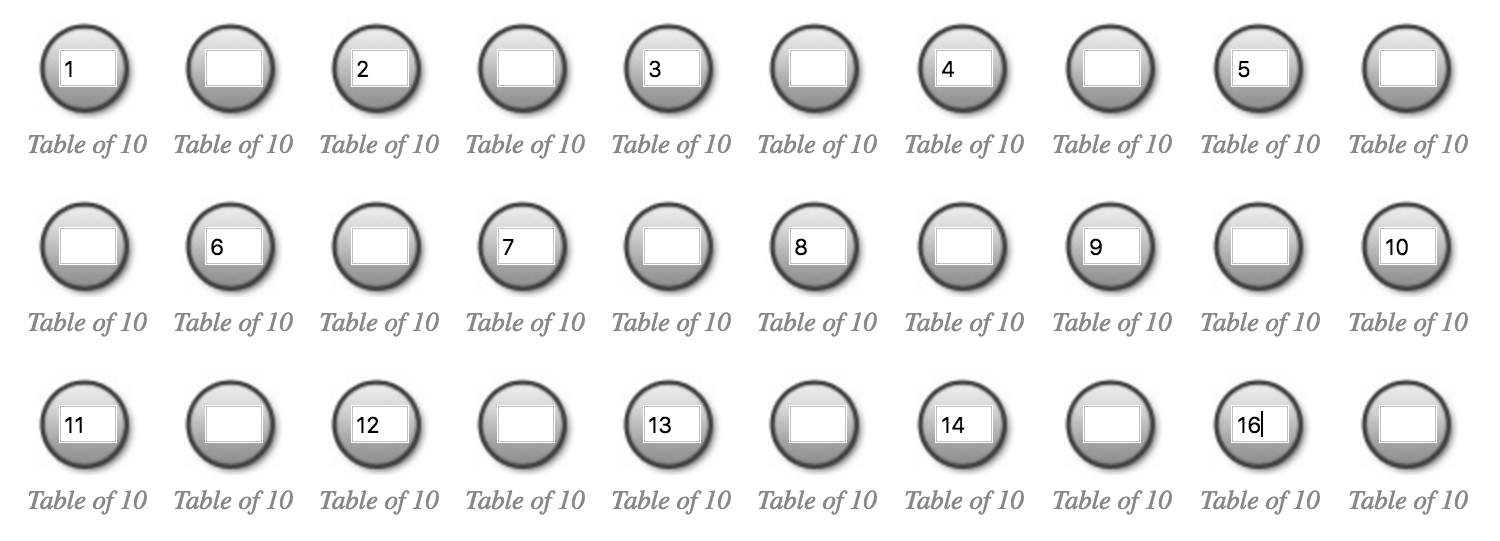
If you have used a table number more than once, you will get an error that you have a duplicate table number. If you use the spacebar and then try to save your work, you will get that same error. Please make sure you use your backspace or delete key to remove table numbers.
When you are finished, click Save to save your work.
If needed, you can add another row of tables to the bottom of you chart by clicking Add More Tables once you save your work. Note: You cannot add tables to the sides (rows) of the chart without recreating the chart.
Adjust the default table limits by clicking either the Table link or the number itself.
Should you need to start over, you can delete the chart by clicking the Delete link in the upper right hand corner.
Please only use numbers. Other characters will not work in Live Check-In.
Assigning Groups to tables
Before assigning your guests to tables, they need to be assigned to Groups in Manage Registrants.
Manually assigning Groups to the Table Chart
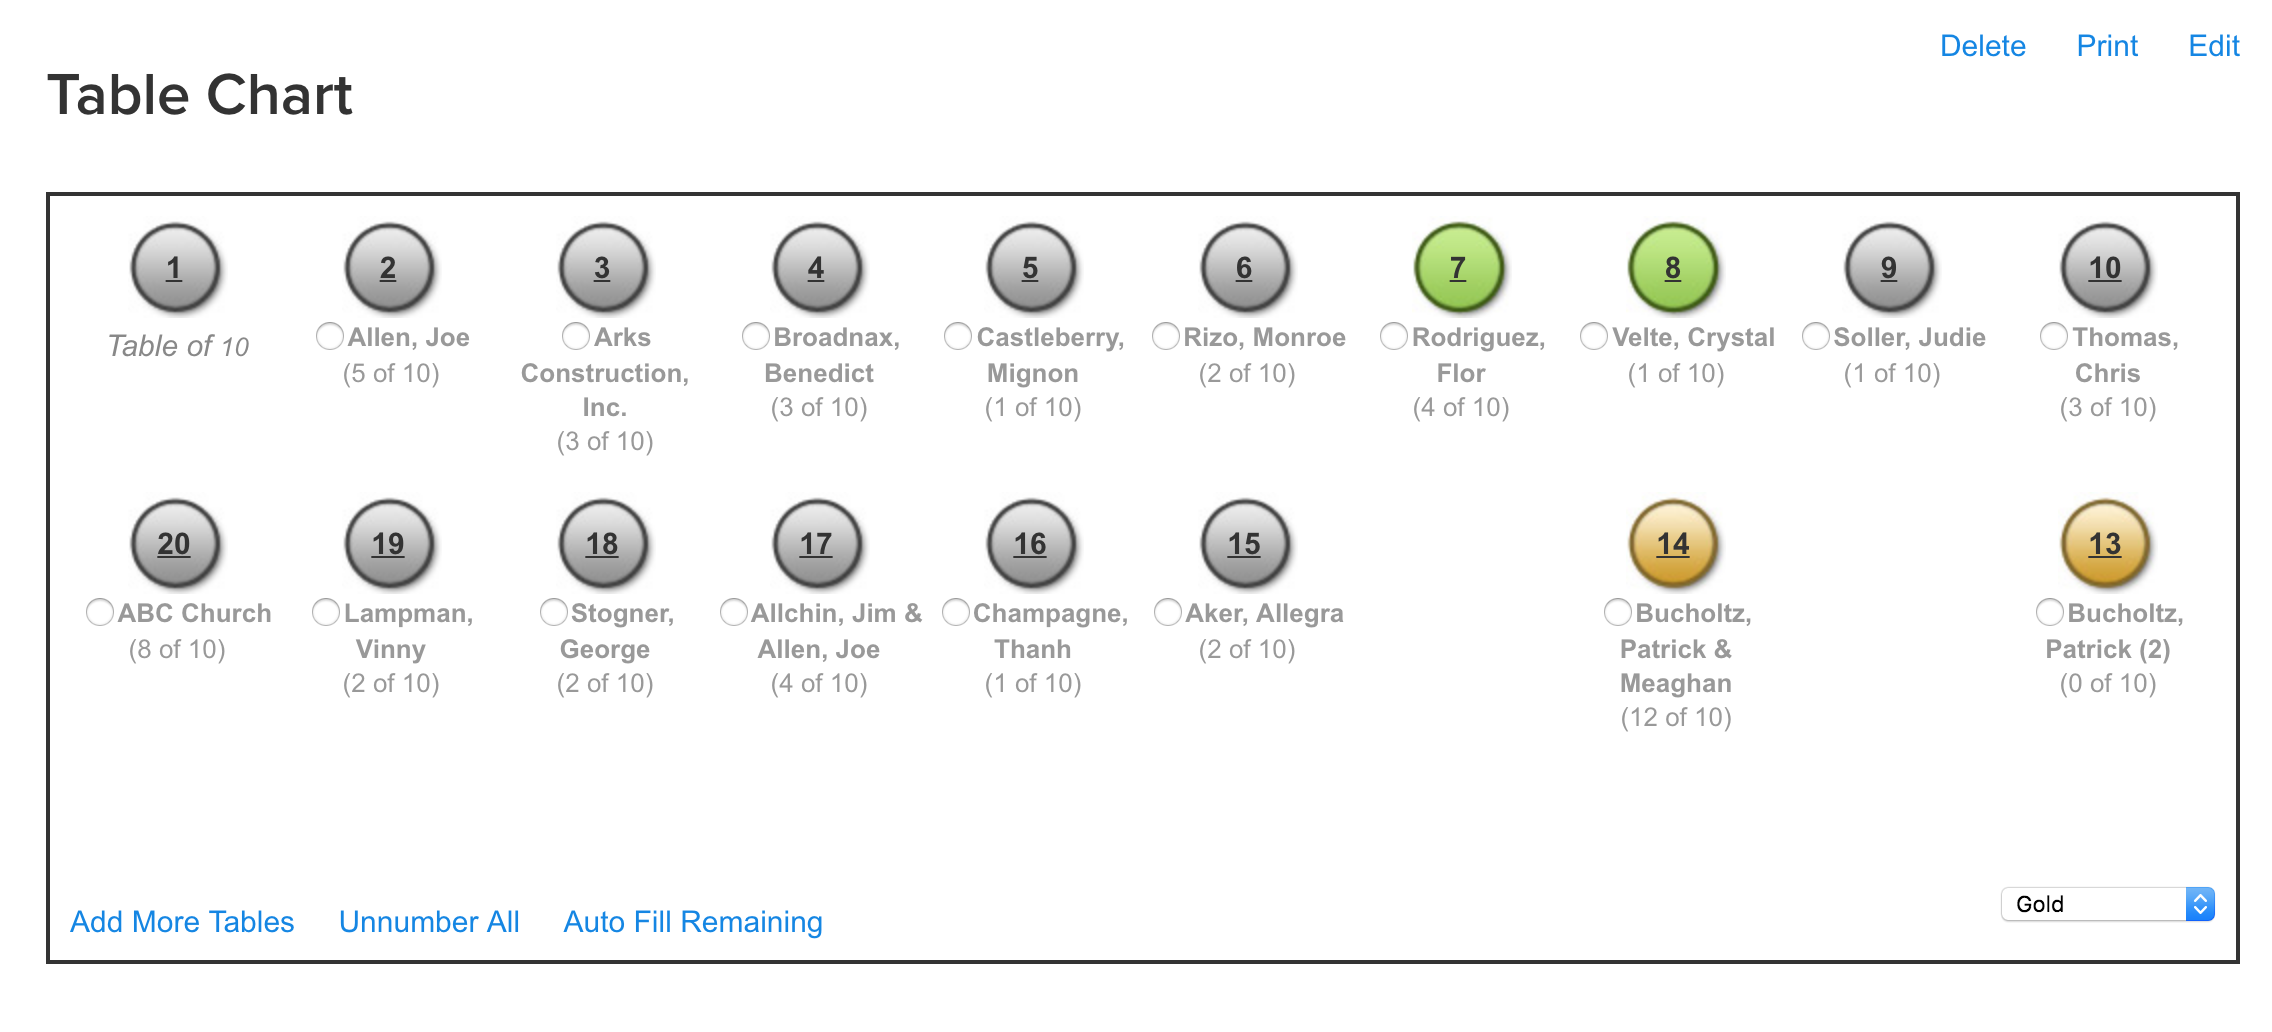
In the Unnumbered Tables section at the bottom of the Table Chart tab, click the option button next to the table that you want to assign.
Click on the table number at the top.
Repeat this for each group that you want to assign to a specific place.
Note: For hybrid events, only in-person groups are shown in the Unnumbered Tables section. Virtual groups are not shown and cannot be placed at tables.
Using autofill to fill your tables
Click Auto Fill Remaining.
Any groups that are larger that the limits on the remaining table chart will not be autofilled. In that case, change the limit on the remaining groups and then click Auto Fill Remaining again. Or you can manually place each group and update the limit as you place them.
Moving Groups on the Table Chart
After a Group is on the chart, you are able to move it around as needed. You can move it to an empty table, or you can flip-flop two Groups that are assigned to the chart.
Move a Group to an empty table
Click the dot next to the name of the Group you want to move.
Click on the number of the table you want to move them to.
Flip-Flopping Tables
Click the dot next to one of the two Groups you wish to move.
Click on the number of the table you want to flip-flop.
Move Groups off the Table Chart
Click the dot next to the Group's name, then click on the Unnumbered Tables heading.
You can click Unnumber All to take all Groups off the chart. This will place all the Groups back in the Unnumbered Tables section.
Assigning colors to tables on the Table Chart
Assigning colors helps certain Groups stand out so you can see Groups that you need to keep together.
Assigning colors as you move Groups
Select a color from the drop-down menu.
Under Unnumbered Tables at the bottom, click next to the Group you wish to assign the color.
Click on the table number where you want to move them.
Assigning colors after you have moved Groups
Select a color from the drop-down menu.
Under their table number on the Table Chart, click the dot next to the Group you wish to assign the color.
Click on the number of the table.
Printing your table chart
You can print your Table Chart by using the Print icon in the upper right corner of the screen. This will open a printable version. Remember to change your view from portrait to landscape in your printer settings.
You can also save the Table Chart as a PDF if you're using Chrome as your browser.
Click the print icon.
Use CTRL (CMD on Mac) + P to open the print menu in Chrome.
Change the printer to Save as PDF.
Save the chart as a PDF on your computer.