The Mailchimp integration uses Zapier to link your FundEasy events with Mailchimp. This integration is accessible in the Integrations tool in the toolbar on the left.
(Note: for more information about Zapier, check out this article.)
Once the Mailchimp integration is turned on, it is triggered when someone registers to a FundEasy event. Upon registration, the integration adds the registrant's email address to a list in Mailchimp and tags it as an event registrant so that you can email those registrants from Mailchimp in the future.
Setting Up the Mailchimp Integration
Here's how to set up the Mailchimp integration:
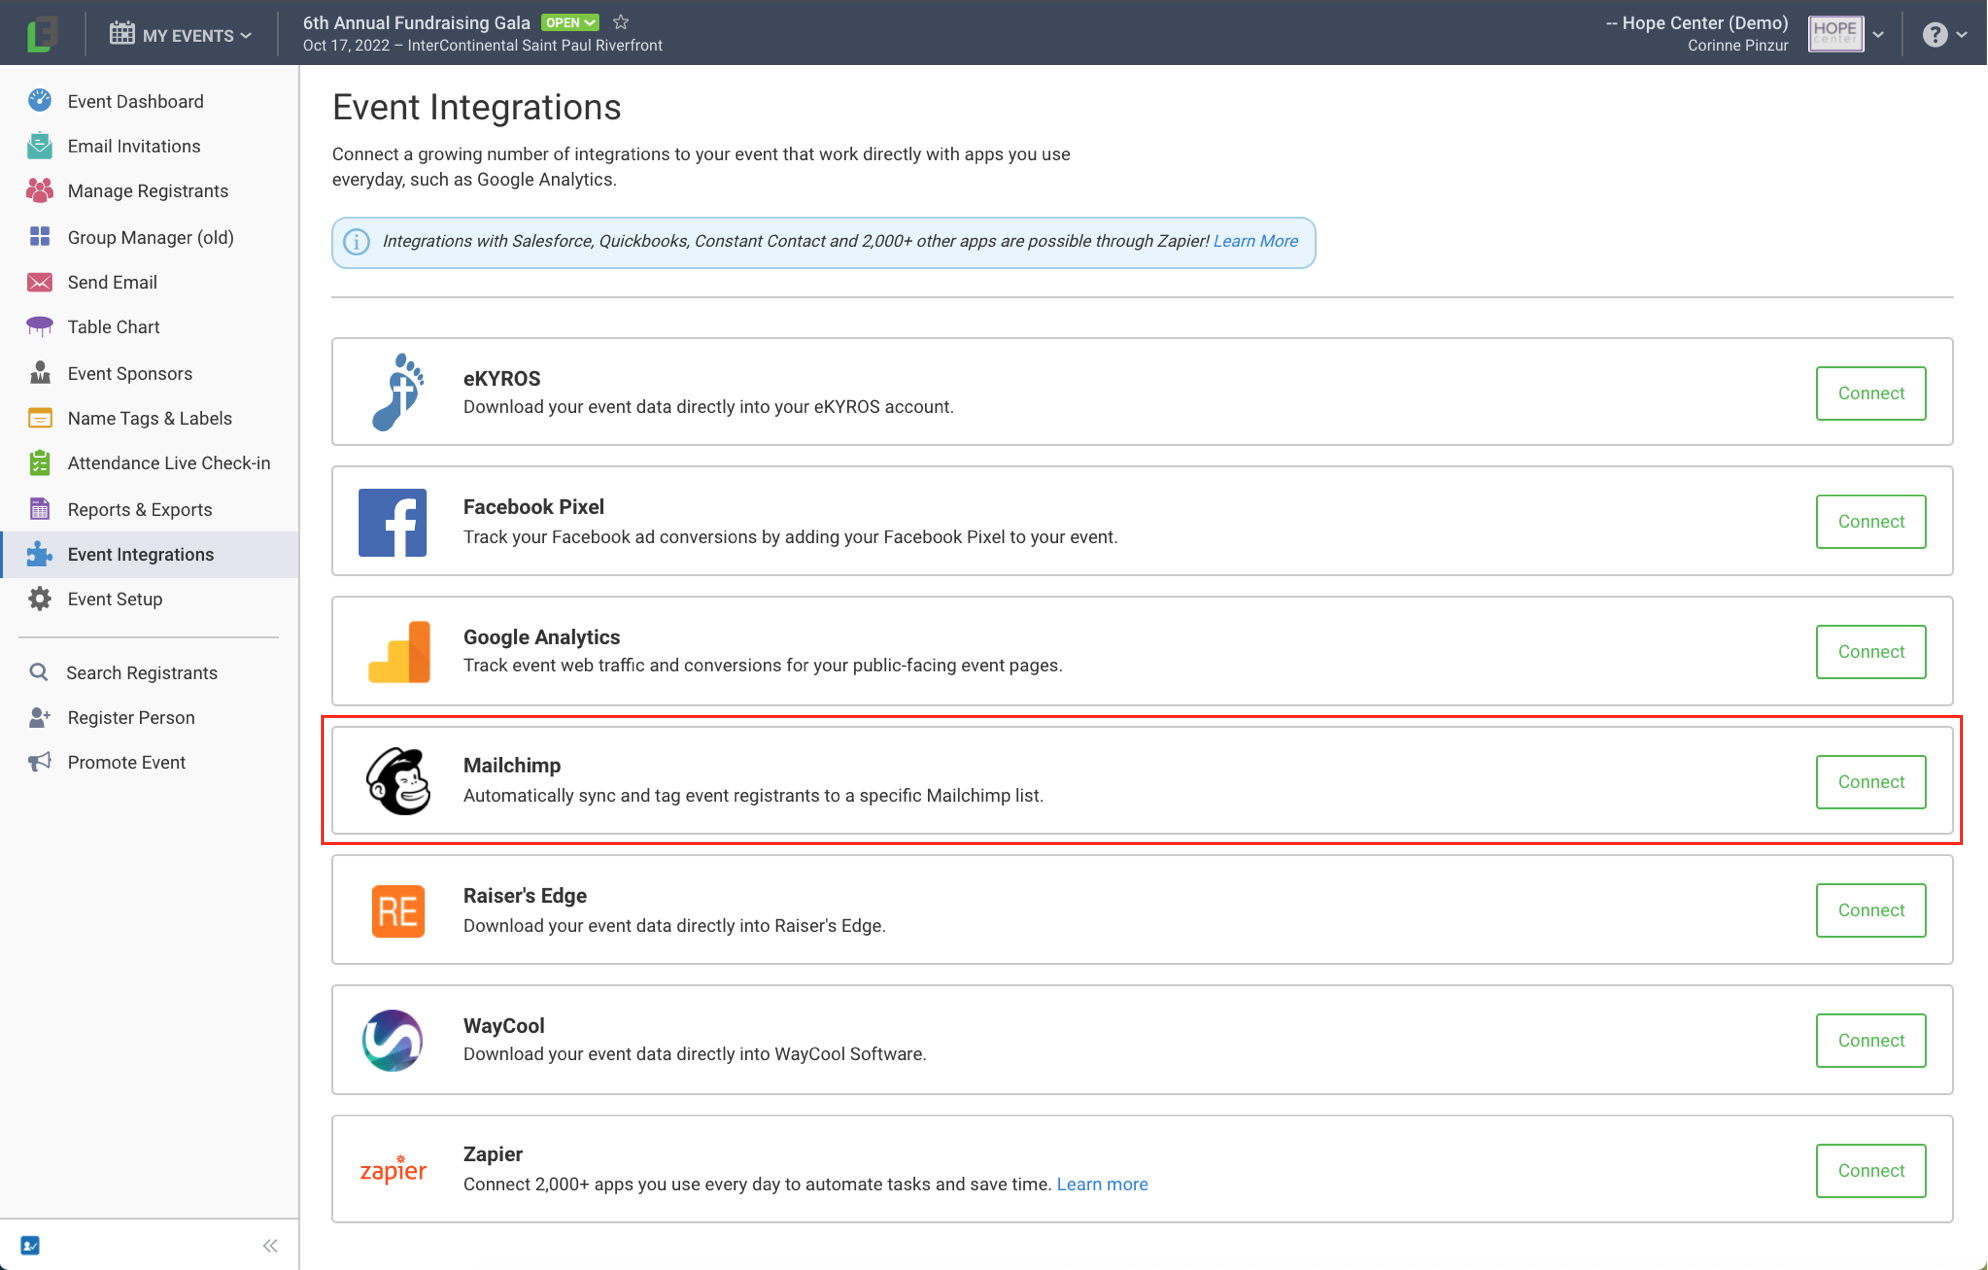
Go to Event Integrations on the left and click the green Connect button for the Mailchimp integration.

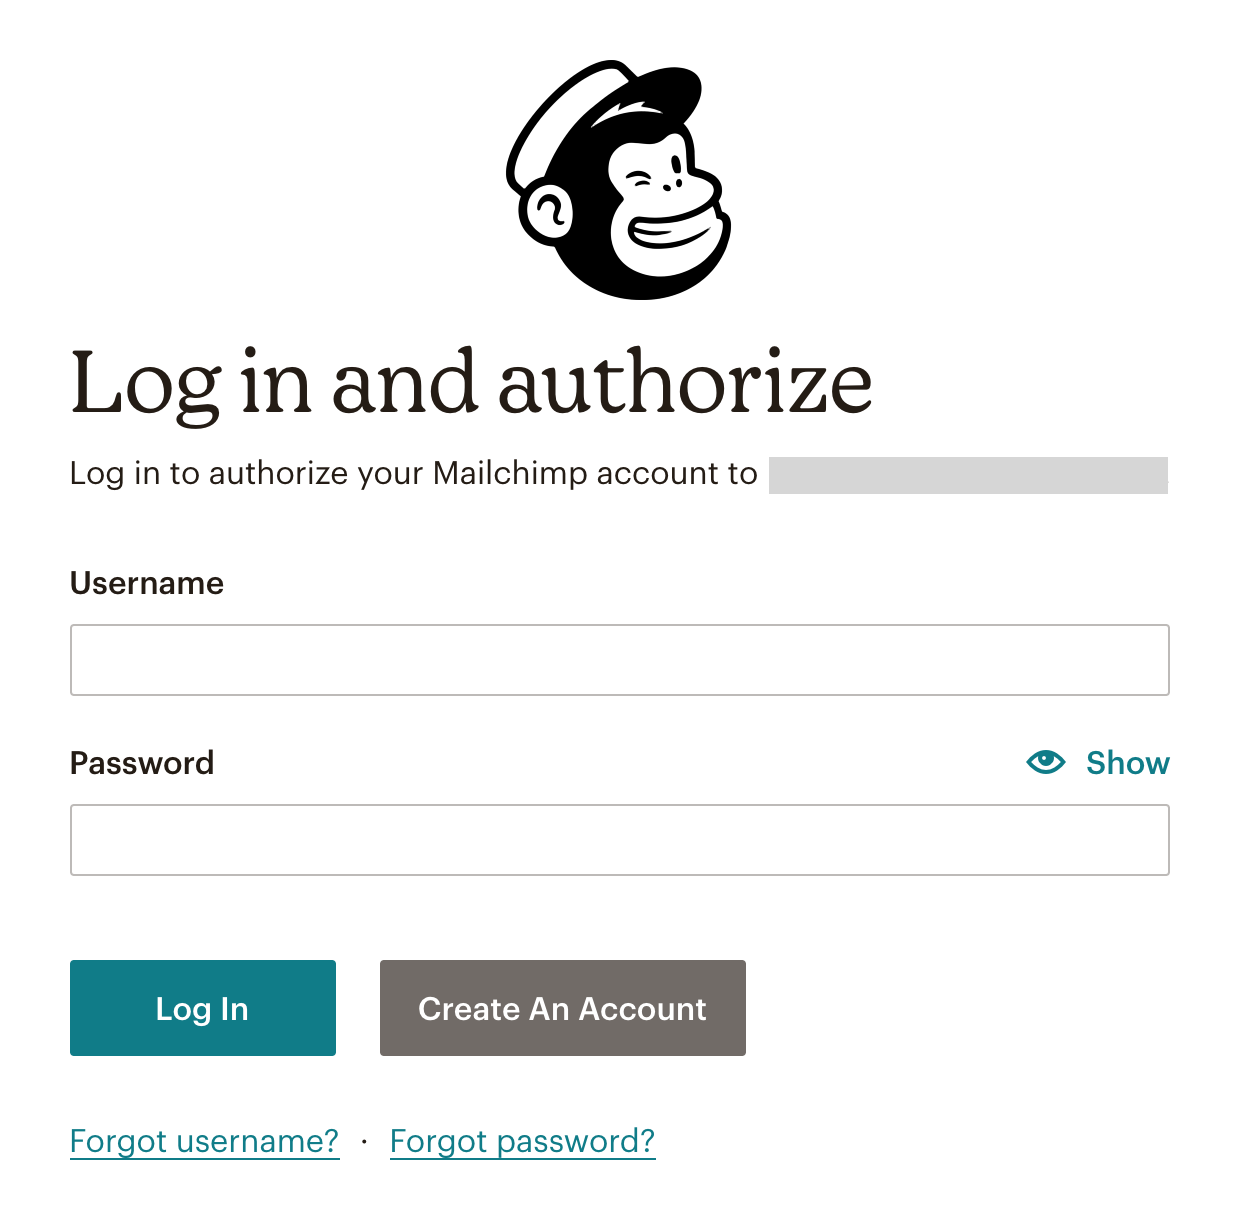
Log in to Mailchimp.
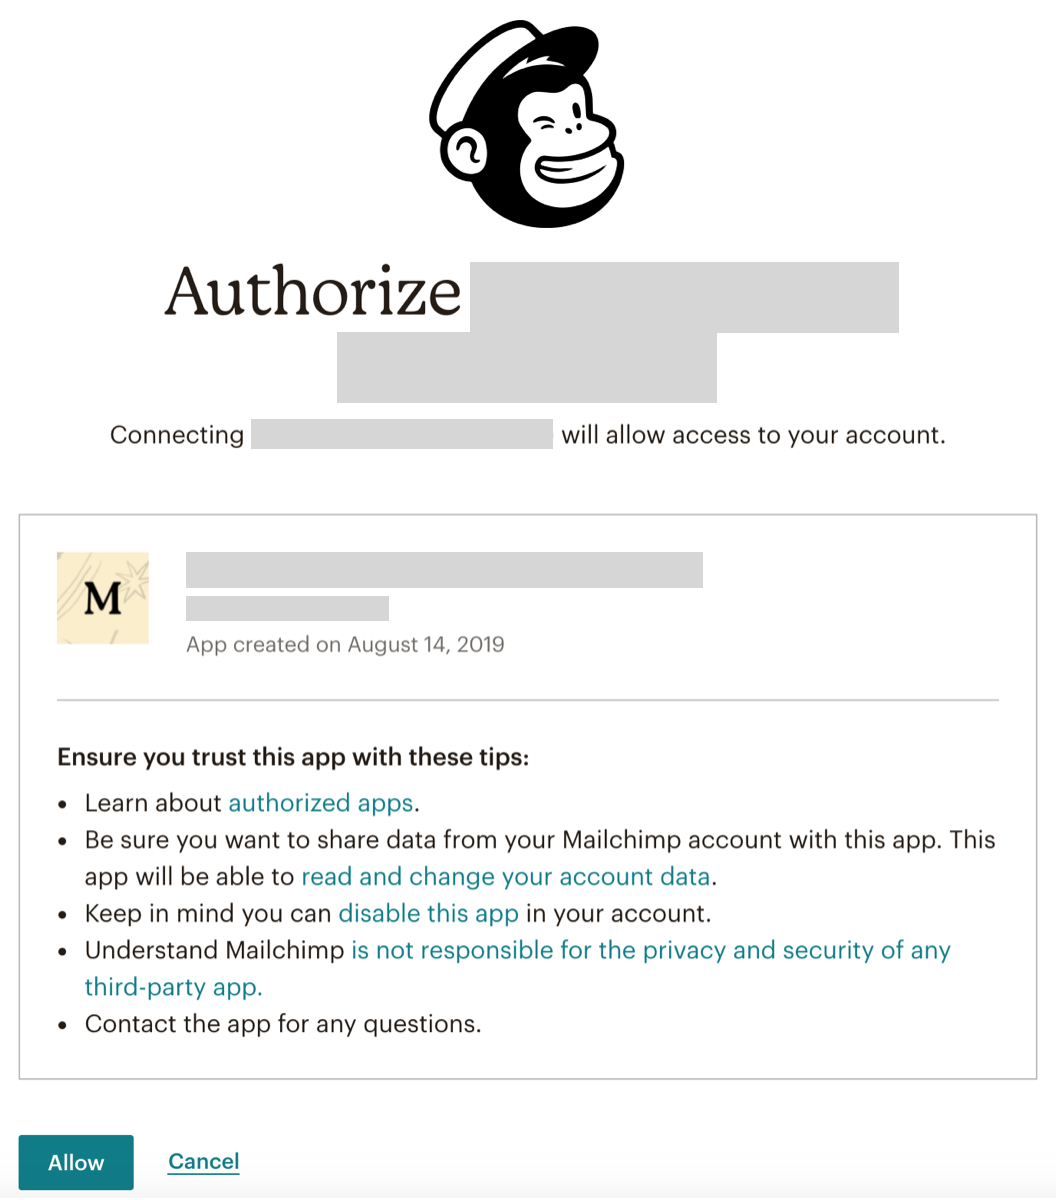
Authorize the connection between your FundEasy account and Mailchimp by clicking "Allow."
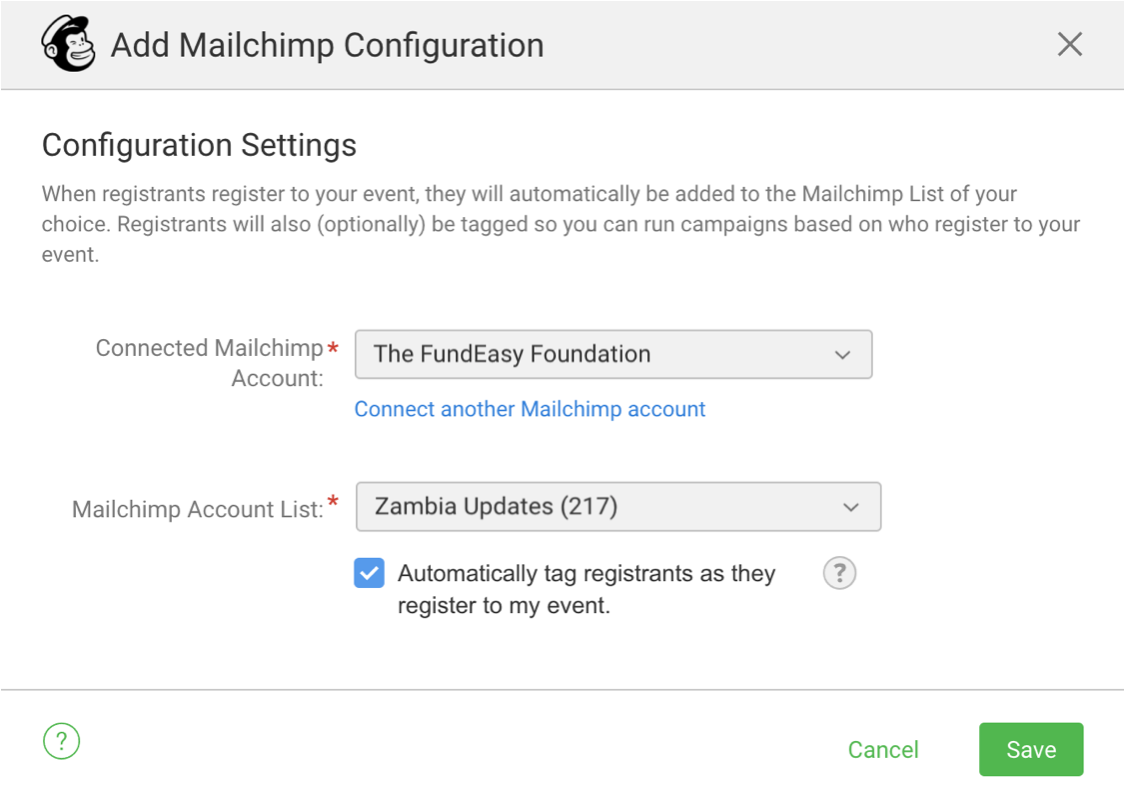
Once you authorize your FundEasy account to connect to Mailchimp, select a Mailchimp account and list and click Save. Check the box below the Mailchimp Account List field if you want FundEasy to automatically tag your registrants (see the section about automatically tagging registrants, below).
Once you save your Mailchimp configuration, you'll see that the integration is turned on (on the Integrations page).

Here are a few notes about this integration:
This integration does not track any emails sent through Mailchimp.
This integration does not allow you to send emails through FundEasy to your Mailchimp contacts.
This integration does not automatically import Mailchimp email addresses into FundEasy. However, if you have contacts in Mailchimp, you can export the email addresses from Mailchimp as a CSV file and then import that CSV file into FundEasy in the Email Invitations List tool.
Since this integration is triggered by registrations within FundEasy, the email addresses of people who registered before the integration was turned on will not be pulled into Mailchimp.
Automatically Tagging Registrants
Tags allow you to create segments in your Mailchimp list. For example, if you would like to email the Gold Sponsors in your list, you could add a "gold" tag to anyone who is a Gold Sponsor. Then, you'll be able to target the people who have the "gold" tag and send an email only to those people.
Some tags are automatically added, if you enabled that option in the Mailchimp configuration settings (see step 4 above). The tags that are automatically added to registrants begin with "ms," followed by the event ID for the event the registrant is registered to, followed by one of the following: the registrant's "status," whether the registrant is a "host," or the registrant's "role."
Here's an example: ms-37789-status:registered
This tag indicates that the person registered to FundEasy event 37789 and his/her status is "registered."
When sending an email, Mailchimp will show you a list of tags that you can choose from in order to send emails to everyone who has the tag(s) you chose. Here is a list of the possibilities for automatic tags that you'll see in Mailchimp:
Registrant Status Tags
ms-37789-status:registered
ms-37789-status:cancelled
ms-37789-status:attended
ms-37789-status:not-attended
ms-37789-status:finished
ms-37789-status:declined
ms-37789-status:incomplete
Group Host Tags
ms-37789-host
Role Tags (Peer-to-Peer only)
ms-37789-role:liaison
ms-37789-role:participant
ms-37789-role:sponsor
These tags can also be mixed and matched. For example, if you want to email all your table hosts who are registered to event 37789, you would email everyone who is tagged with both the ms-37789-status:registered tag and the ms-37789-host tag.
Tags in Mailchimp stay synced with FundEasy. Anytime a status or role changes, FundEasy will automatically update the tag in MailChimp. For example, if a guest registers, they will receive the "status:registered" tag, but if they cancel later, their tag will automatically be changed to "status:cancelled" instead.